Society of Visual Storytelling

    SVSLearn Forums

    • Register
    • Login
    • Search
    • Recent
    • Tags
    • Popular
    • Users
    • Groups
    • Search

    Slowvember Project - Pomegranates

    Slowvember
    6
    14
    1190
    Loading More Posts
    • Oldest to Newest
    • Newest to Oldest
    • Most Votes
    Reply
    • Reply as topic
    Log in to reply
    This topic has been deleted. Only users with topic management privileges can see it.
    • Elliot
      Elliot last edited by

      I’ve been wanting to do some Jewish art, but I haven’t really known where to start. Some doodles in my sketchbook brought me to a pomegranate tree menorah 😄

      I thought this would be a good subject to use for @davidhohn ’s gouache resist technique. And because of the multi stage nature of the process and my increasingly busy work schedule (I work in the grocery industry and we’re ramping up for the winter holidays), this is definitely taking more time and thought than I usually put into my work.

      291DFA28-01BC-4BE1-8418-D47880A6AAD2.jpeg

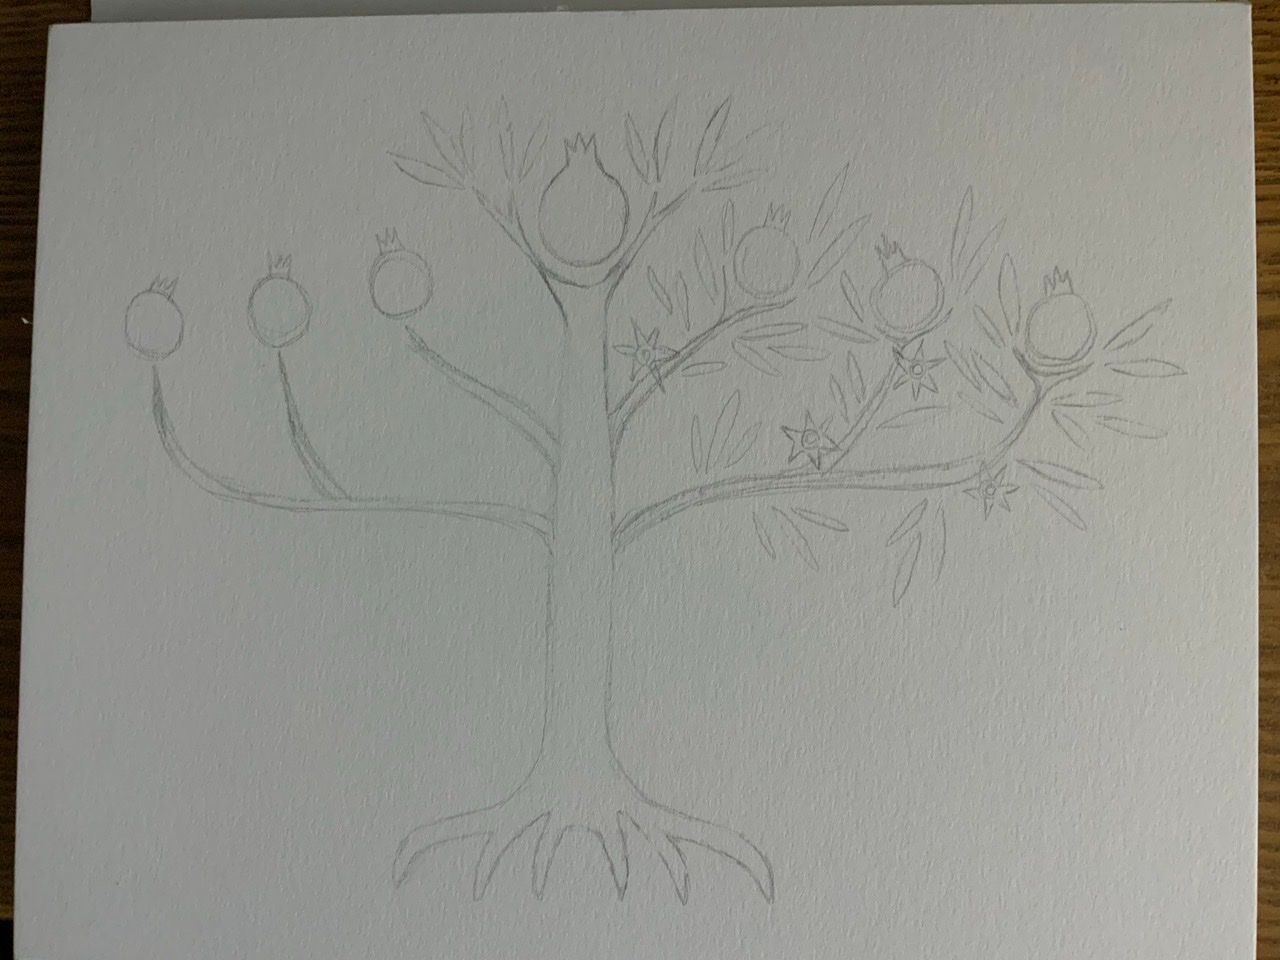
      From initial sketch to procreate refinement (with the symmetry guide!).

      1F4F8DDF-F9E4-4672-9BC6-1E1DA71D0768.jpeg

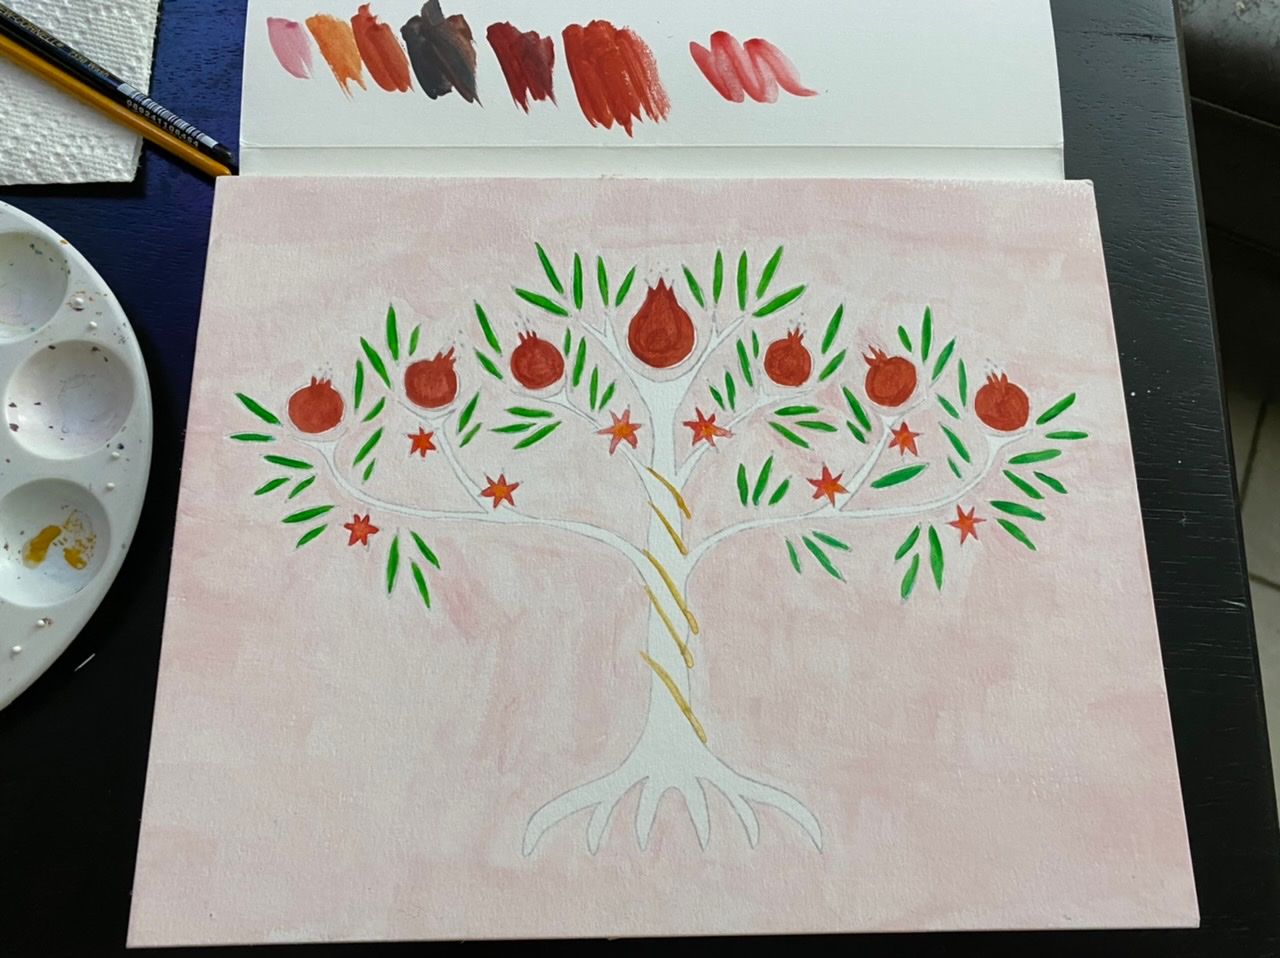
      And from transfer to paint.

      C1F28D92-9ABD-4D9E-9A4B-73E5F51A7B95.jpeg

      A79B7C7B-0C46-4751-B1E7-5BFE9E4ADAF7.jpeg

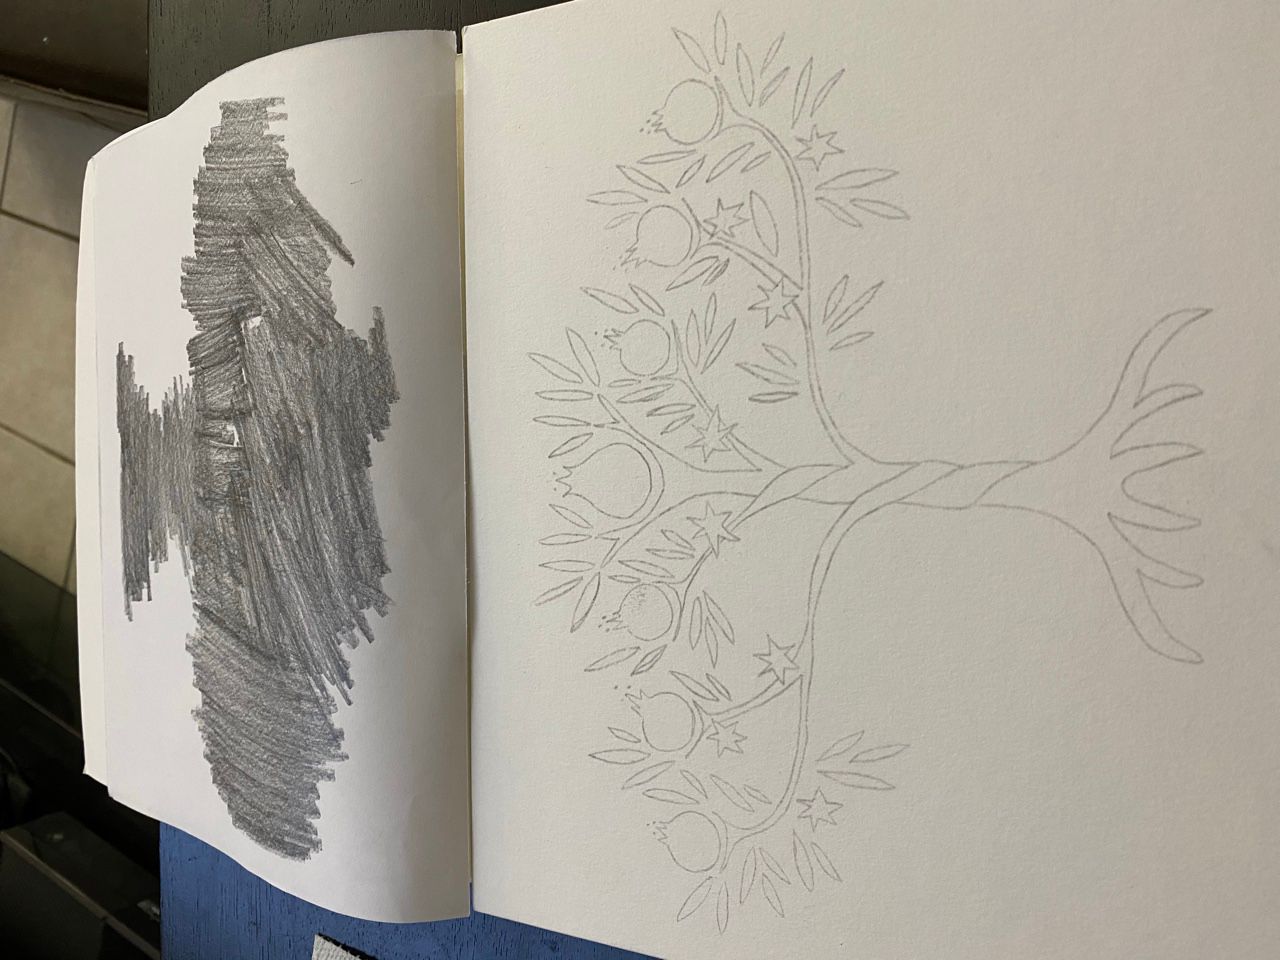
      I was also spending time with my daughter and so I missed a few leaves on the left side, but I plan to add them in on the touch up phase.

      aska 1 Reply Last reply Reply Quote 6
      • aska
        aska @Elliot last edited by

        @Elliot Nice start!
        It took me while to find missing leaves 😉

        Aska
        www.mugaska.com
        https://www.instagram.com/mugaska/
        https://www.etsy.com/uk/shop/mugaska

        1 Reply Last reply Reply Quote 1
        • Elliot
          Elliot last edited by

          Thanks! It’s gone a bit sideways, but I learned some important lessons lol. I will be sure to get all the leaves in the next go round 😆

          1 Reply Last reply Reply Quote 0
          • Elliot
            Elliot last edited by

            1D11056F-D6CD-4547-80B2-72CB6DE5FEDB.jpeg

            I built up a second layer of gouache on the leaves and background.

            7662E5AE-425D-449D-A515-D85E9BF2C9F0.jpeg

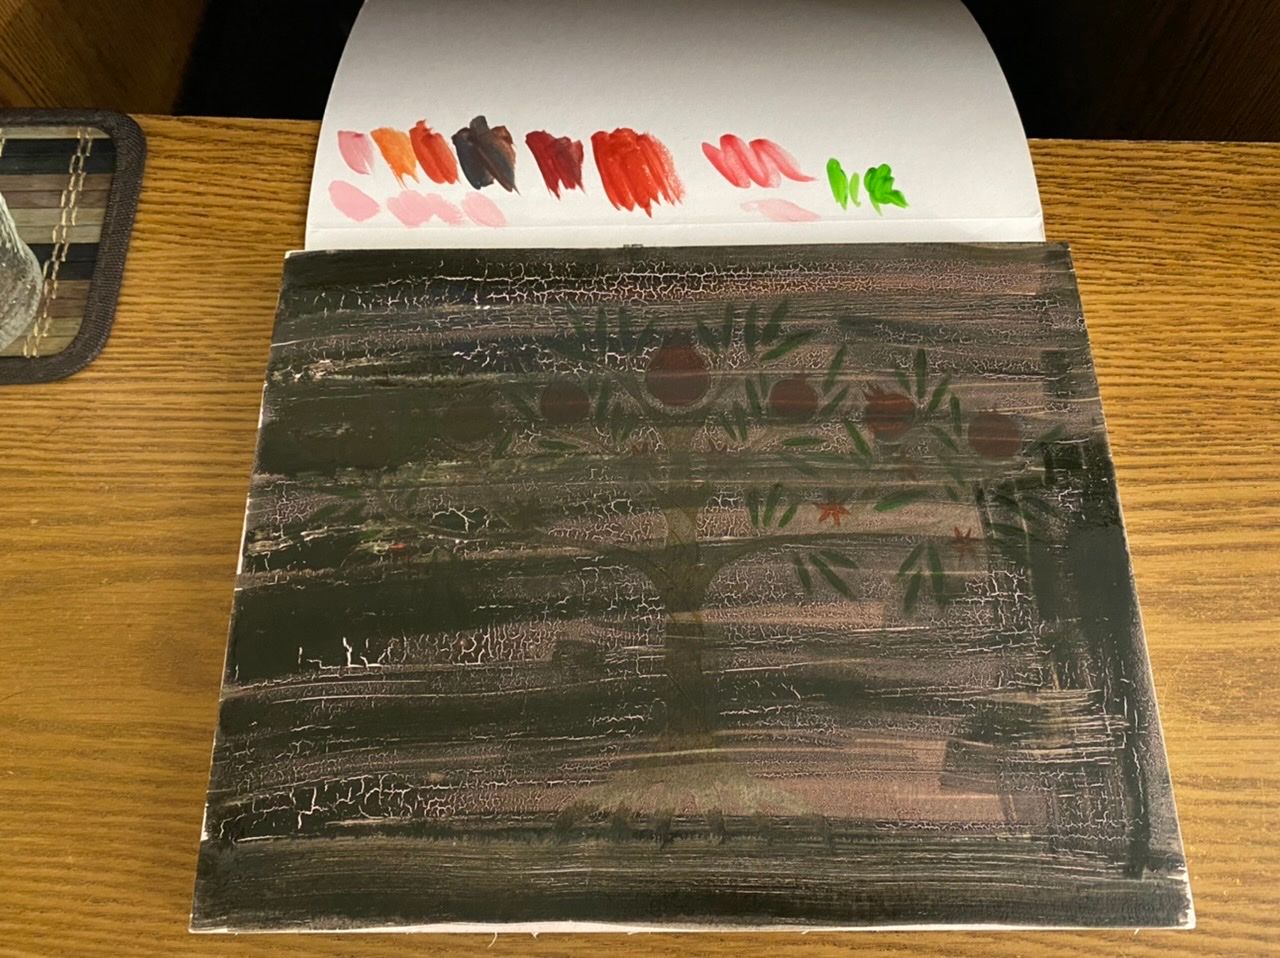
            Applied the ink and then let it dry.

            CBDF5B04-2AF9-4F8C-9FAE-47E1D1B9BDFC.jpeg

            Aaand 😳🤔

            So! I learned my Canson mixed media boards are just paper lightly glued on a thick paperboard - not a thick paperboard. My gouache (Reeves) is super cheaply made with very little actual pigment. I should be more careful about leaving outline space. And I need to be sure to get an even application of ink for this piece, because the streaking does come through. Though that could be a cool purposeful technique to try later.

            Time to try again soon, but I need to get my hands on some better quality gouache and different substrate 🧐

            aska davidhohn Jacy13 VeronicaMui 4 Replies Last reply Reply Quote 3
            • aska
              aska @Elliot last edited by

              @Elliot I don't understand this technique. What's happened? 🙂

              Aska
              www.mugaska.com
              https://www.instagram.com/mugaska/
              https://www.etsy.com/uk/shop/mugaska

              Elliot 1 Reply Last reply Reply Quote 0
              • davidhohn
                davidhohn SVS Instructor Pro @Elliot last edited by

                @Elliot Been there! Both with the substrate and the cheap gouache pigments.
                That said -- this looks cool! I find that with this technique the results never quite match what was in my head. I often have to come back to a piece a week (or more) later and only then realize that it actually is working!

                www.davidhohn.com
                www.instagram.com/davidhohnillo
                twitter.com/david_hohn

                Elliot 1 Reply Last reply Reply Quote 2
                • Jacy13
                  Jacy13 @Elliot last edited by

                  @Elliot I like the result! I think it still looks really neat, even with the cheap stuff. The "woodblock" effect is still there 🙂

                  Deviantart: https://www.deviantart.com/jacy13
                  Instagram: https://www.instagram.com/jacy13draws/?hl=en
                  Portfolio: https://jacy13.artstation.com/

                  1 Reply Last reply Reply Quote 1
                  • LauraA
                    LauraA SVS OG last edited by

                    Cool! I like both the design of this and the idea of working with the gouache resist technique. I wouldn't worry too much about the material failure. It was an experiment! I look forward to seeing versions 2, 3, and so on 😉.

                    Instagram: https://www.instagram.com/lauraintorino/
                    http://lauraaldersonart.com/

                    1 Reply Last reply Reply Quote 1
                    • Elliot
                      Elliot @aska last edited by

                      @aska The basics are that you use the gouache to act as a resistant layer on the paper vs the ink you apply later in the process. Then you rinse the piece with water to remove the excess gouache and are left with a woodcut style piece with color stained areas. 🙂

                      1 Reply Last reply Reply Quote 1
                      • Elliot
                        Elliot @davidhohn last edited by

                        @davidhohn if the paper layer hadn’t buckled I would have come back to it for sure. But it wasn’t salvageable this time 😞

                        1 Reply Last reply Reply Quote 1
                        • Elliot
                          Elliot last edited by

                          BD9AB412-3D2B-4E73-B305-8E4B0F3C17A2.jpeg

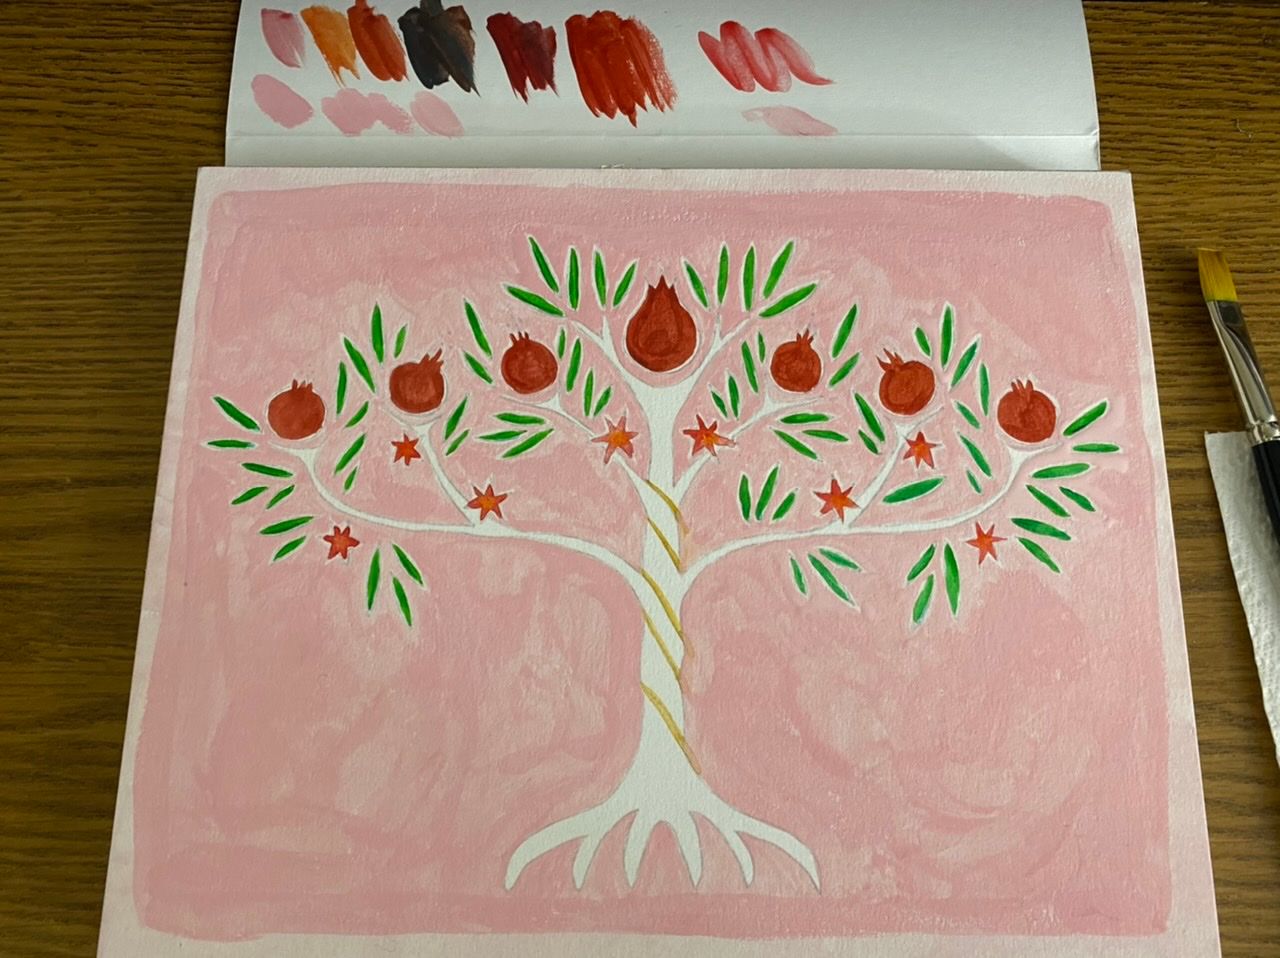
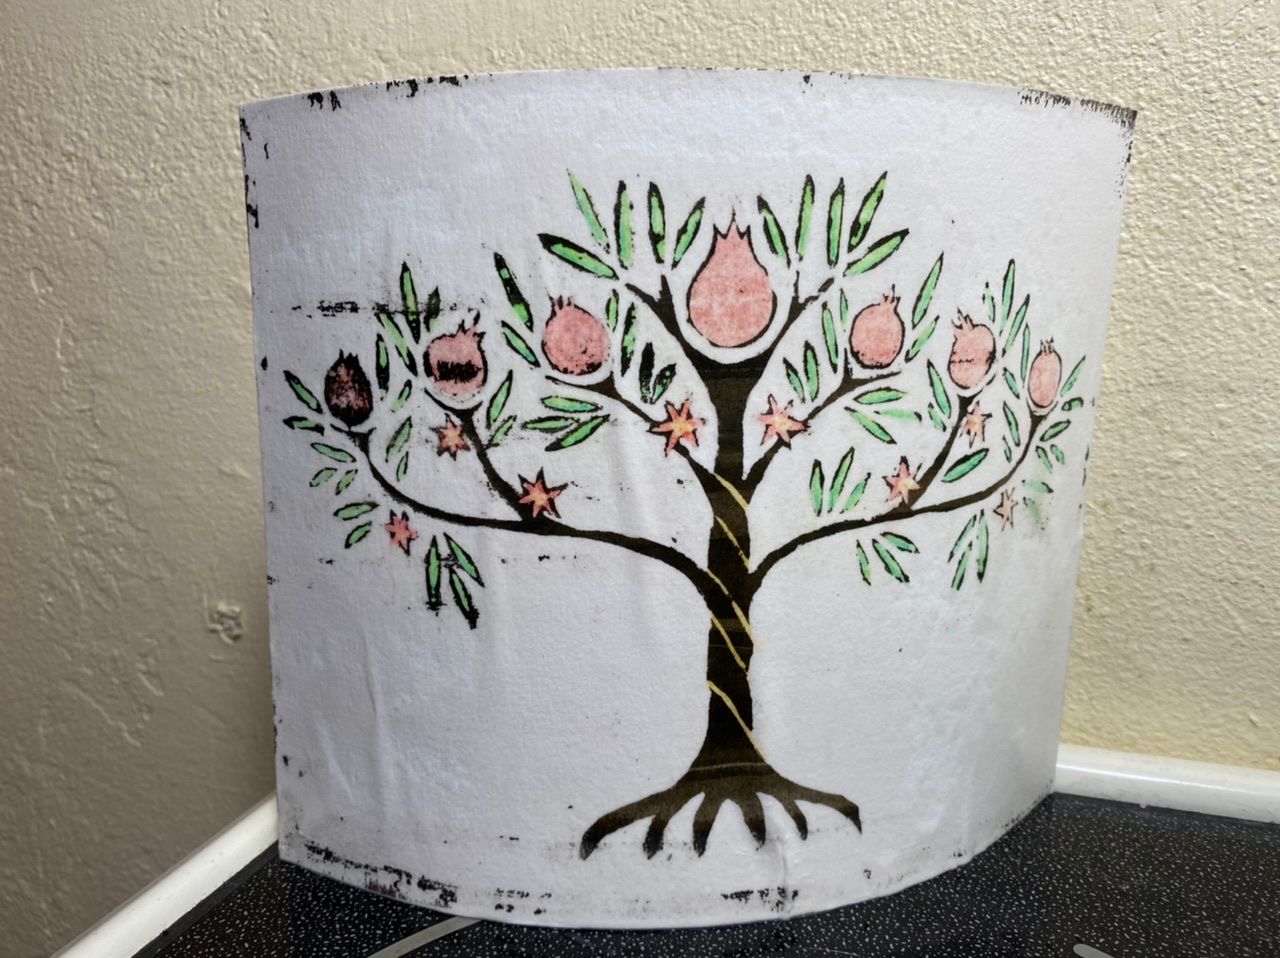
                          Take two! This time I transferred my image with a color pencil to get a thicker line and have a color difference on my transfer paper. Harder to miss sections when you can see where you’ve traced 😄

                          8FD89302-EACC-4F53-8AE3-966E1820A369.jpeg

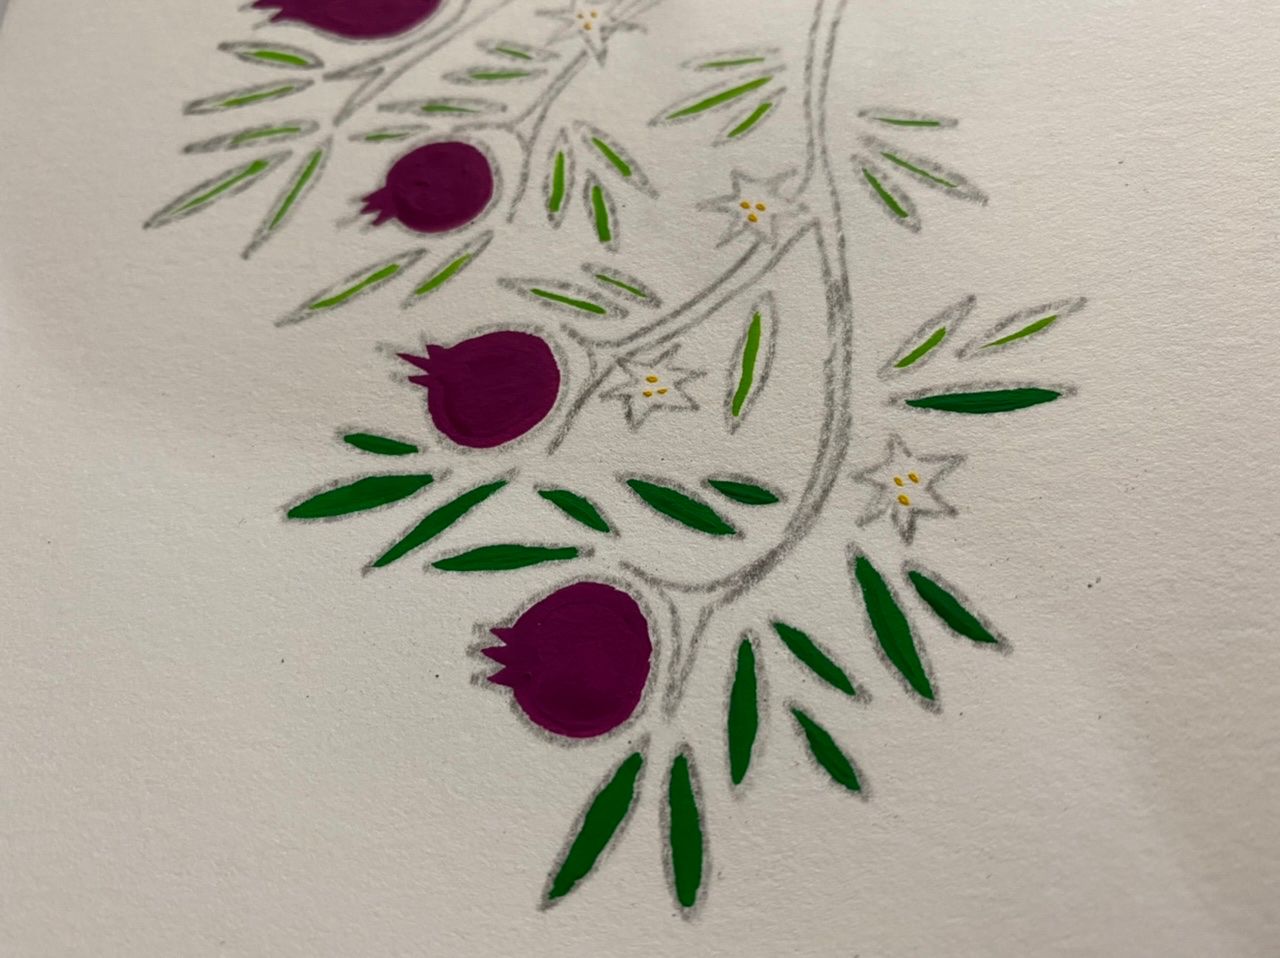
                          I sprung for the Winsor and Newton primary gouache set and WOW what a difference. I can’t even describe how wonderful these paints are to work with. I hope they stain better than the Reeves!

                          I’m also using 140lb hot press watercolor paper this time. My pad is slightly smaller this time as well (10x7 vs 8x10). And I’m taking more care with my brushwork - slowing it down for slowvember 😎

                          1 Reply Last reply Reply Quote 3
                          • VeronicaMui
                            VeronicaMui @Elliot last edited by

                            @Elliot wow I love this effect though!! I was intrigued when the ink was applied and didn’t know what to expect - I was not expecting that look at all, now I’m going to have to watch this class too! I’m interested to see what happens now with the Windsor and Newton set

                            WEB: Www.veronicamui.com

                            IG: https://www.instagram.com/Veronica.mui

                            Elliot 1 Reply Last reply Reply Quote 1
                            • Elliot
                              Elliot @VeronicaMui last edited by

                              @VeronicaMui It's really fun and I think it would be a great technique for your style too! 😃

                              1 Reply Last reply Reply Quote 0
                              • Elliot
                                Elliot last edited by

                                Good news: the Winsor & Newton gouache definitely left more pigment on the paper and the paper is very strong 💪

                                Bad news: I think the gouache was deceptive with how thick and creamy it felt and looked, because the ink coated it and leaked through it too much.

                                I scrubbed the paper with a silicone sponge three different times, but in the end it mostly rubbed off the pigment and I still have a giant ink blot lol.

                                83BBCF40-5FC1-4A08-997A-53A22C9E70F2.jpeg

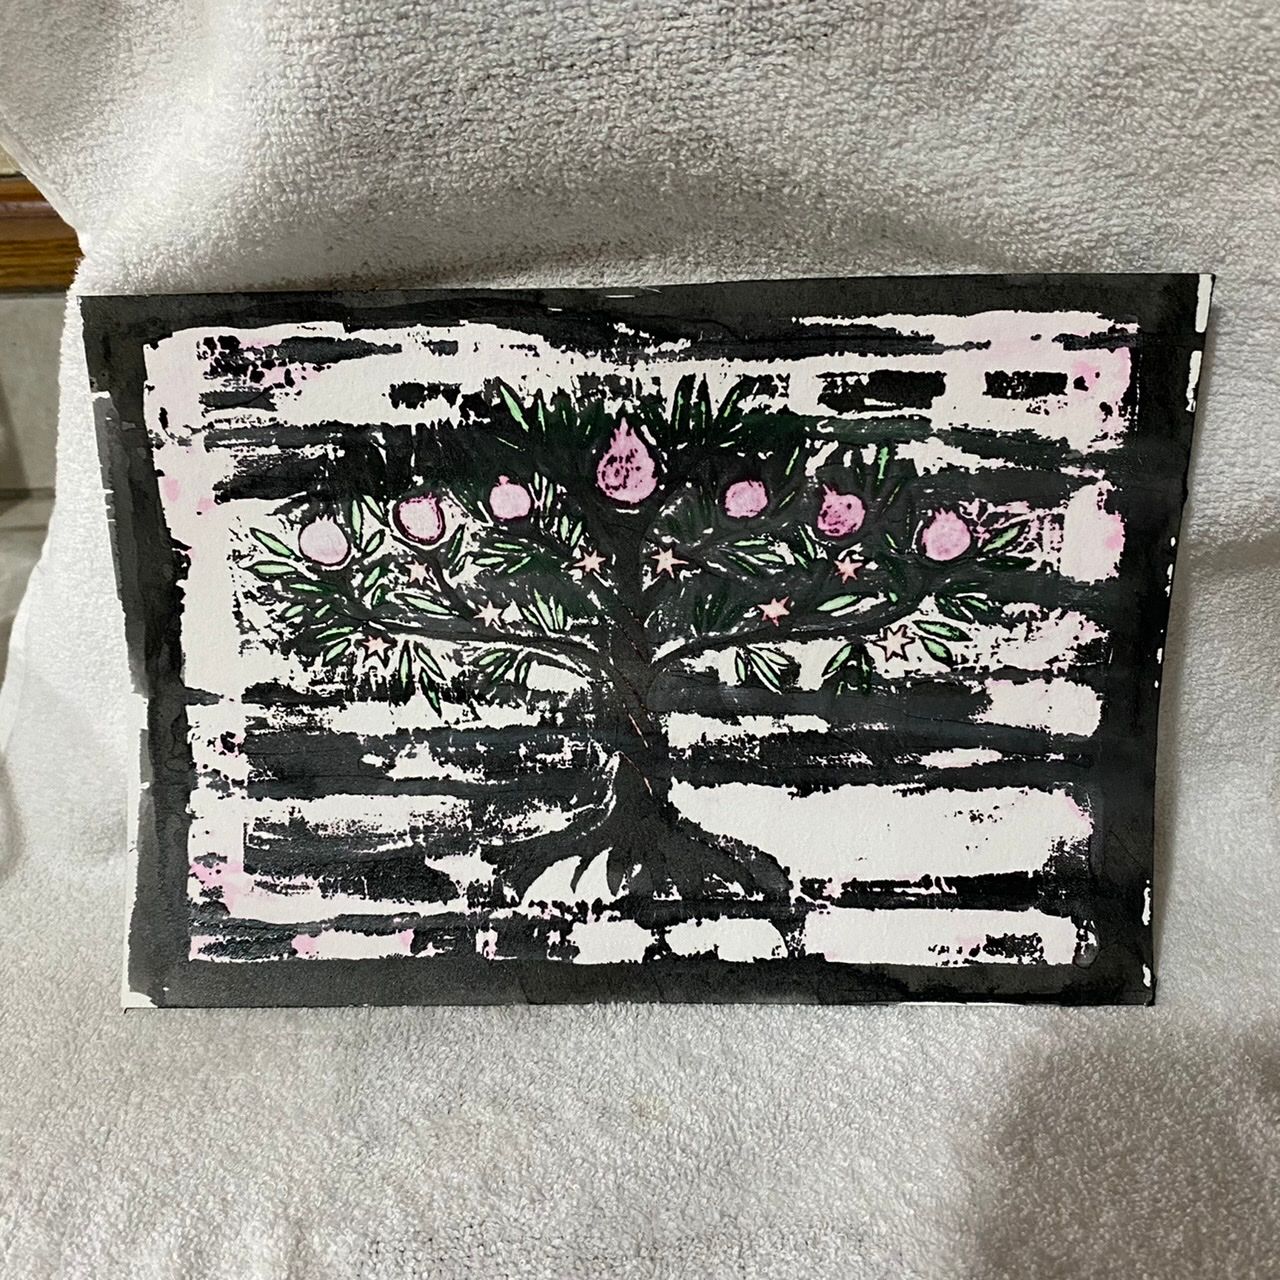
                                Next time will include two layers of gouache.

                                1 Reply Last reply Reply Quote 1
                                • First post
                                  Last post