Children's Book Pro templates and resources questions
-
Hi! I'm trying to finish my Children's Book Pro dummy, and I have a couple of questions for any of you who have finished yours, or for the instructors.
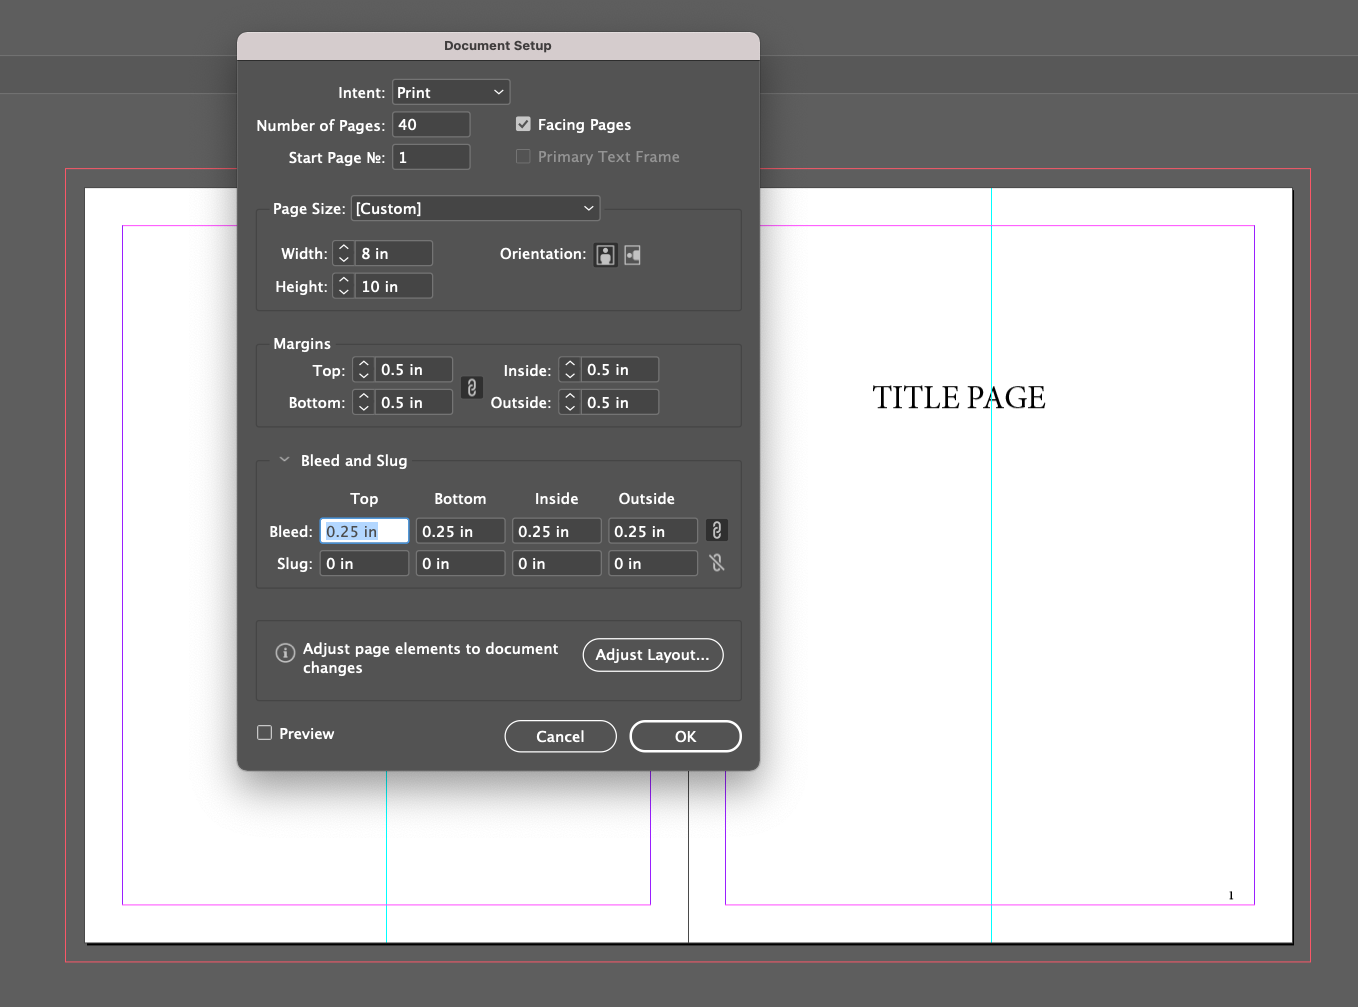
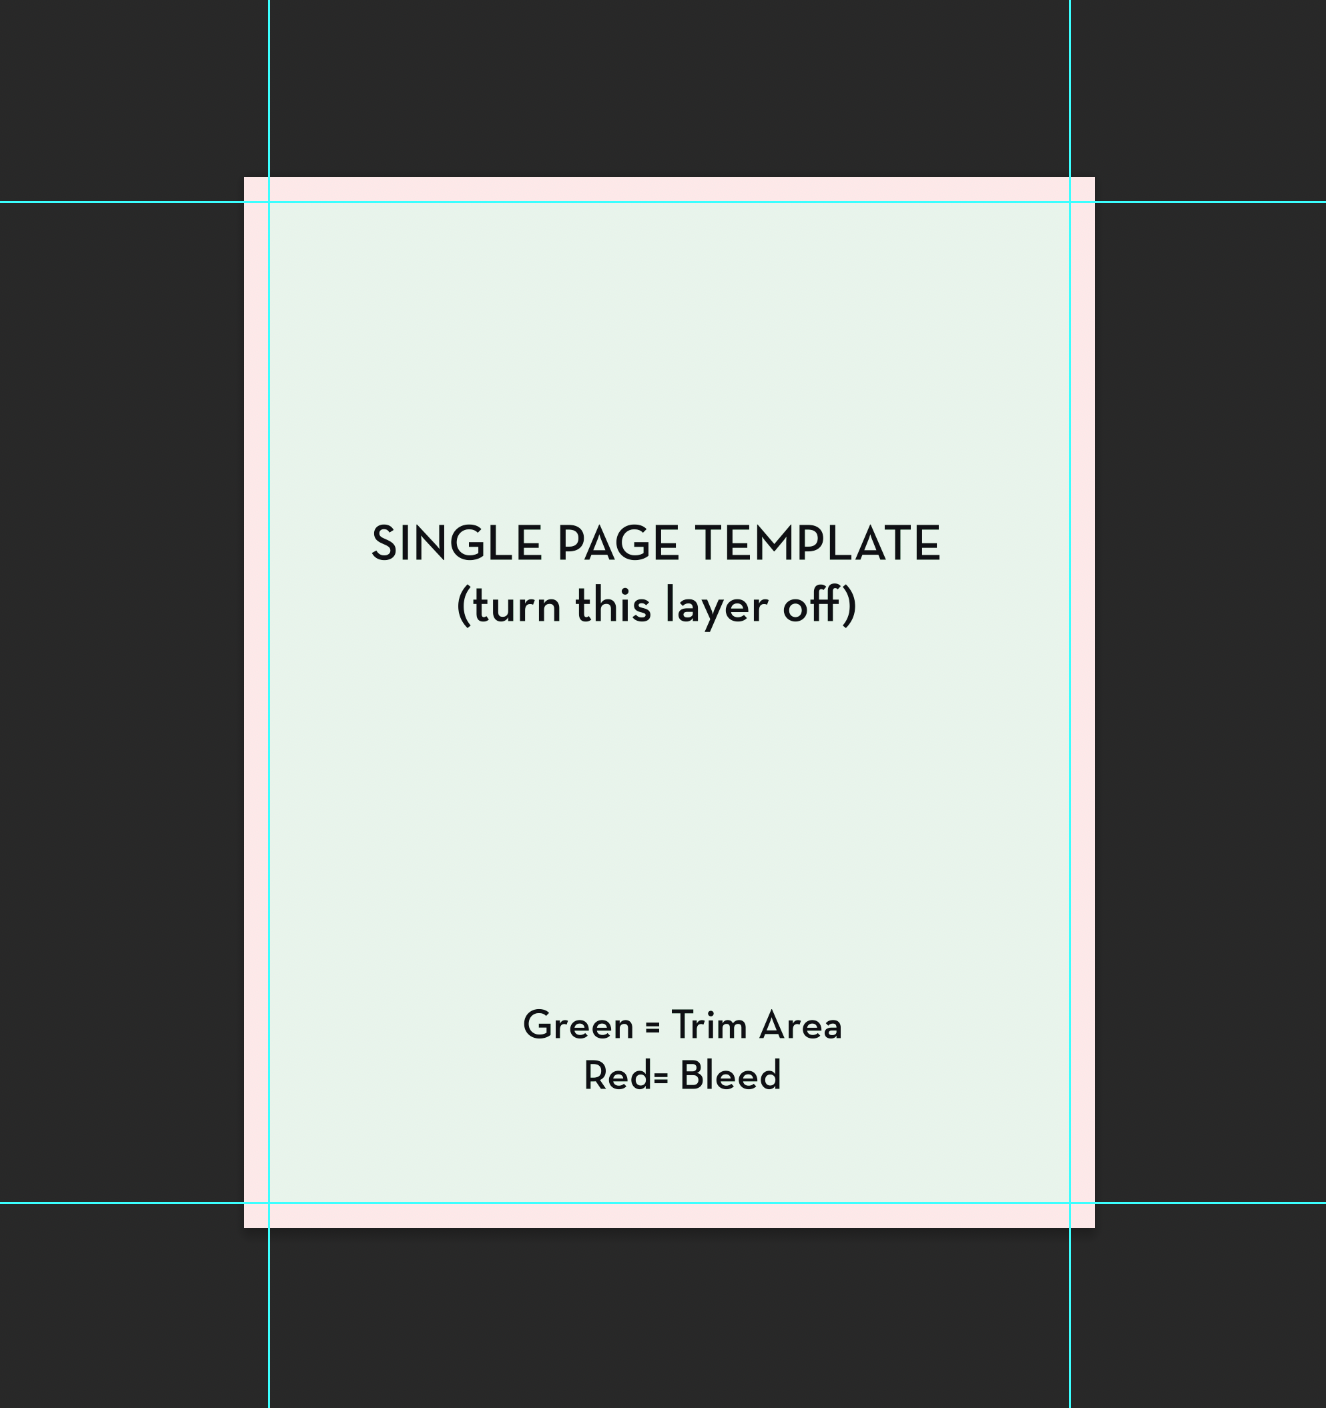
First, in lecture 6.2b in the week called "The Dummy," @Lee-White implies, but I'm not sure he ever says outright, that the InDesign templates do not include bleed. My reasoning is that the InDesign doesn't have bleed because he talks about bleed in the Photoshop templates but not in the InDesign one, and because the measurements in the InDesign template are straight 8 x 10 instead of having the 1/4" all the way around the perimeter that the Photoshops ones have. Can someone confirm that? But what, then, are those pink guidelines 1/2" into each page? Is that for text margins? Is it the "live area"?
Second, in lecture 6.1, processes and procedures, @Jake-Parker talks about a Google doc with a checklist spreadsheet. I looked though all my files, the old Discord, and the whole course shell, but don't see them. Does anyone have a link?
Thank you!
-
@LauraA Hi Laura, I've just downloaded the .indd file and there is no bleed in the page setup. I would just add the bleed on in the page setup (as in the screenshot) and you can import your full bleed PSD and sit it on the page correctly. Then you have the choice whether to export the PDF with or without the bleed as required by ticking the checkbox on and off in the export settings.
It's not that normal with print jobs to proof a visual with bleed as it gives a bit of an inaccurate view of the page as it is bigger than the trimmed size. This may be why there is no bleed settings on the InDesign file. I am not that far into the CBPro course (and I have never proofed a book dummy) so there may be a reason why you would send the dummy PDF visual showing the bleed and crop marks rather than just exporting it to it's trim size. If it was going to be printed then bleed is a must.
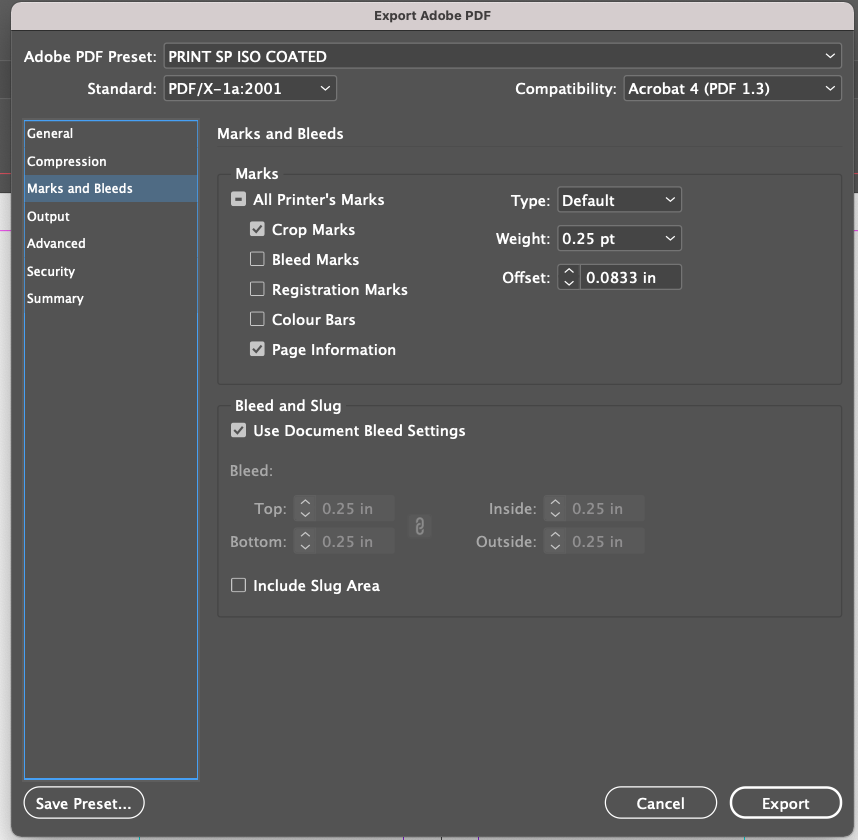
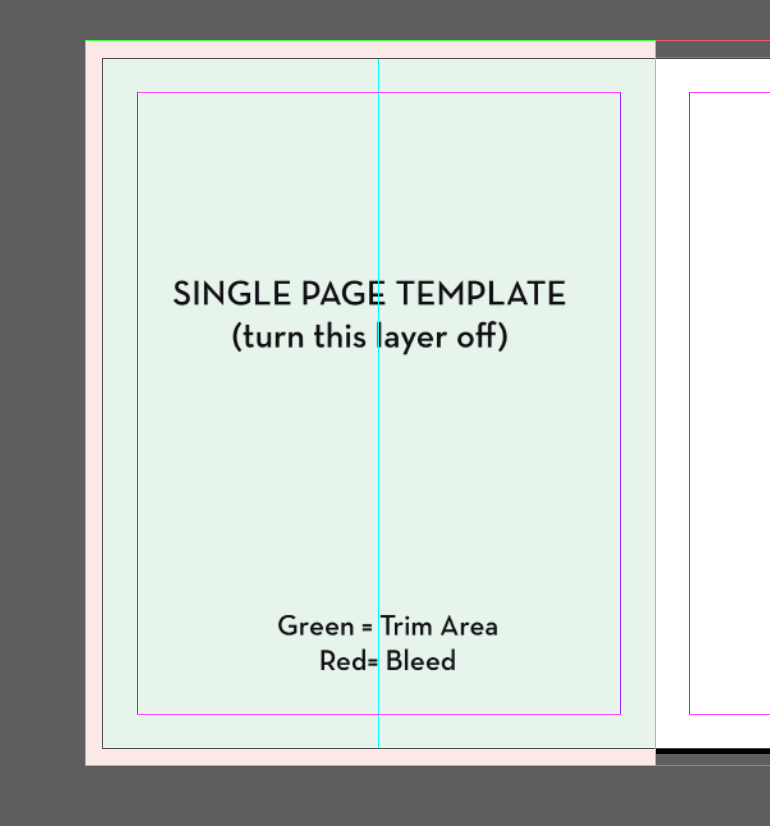
Here is the file with the bleed added, the bleed is showing as the red lines around the pages. I have changed the bleed from 0 to 0.25 in this screenshot.
When you export to PDF you can just turn the bleed on and off you you can choose to show it or not. Here I have it so it would export with bleed but if you uncheck the tick it will export without bleed. (Ignore the PRINT SP ISO COATED bit at the top, thats just a custom PDF print preset for a certain print job, I forgot to change it).
The pink lines are your page margins, you can adjust them to your/print specifications.
A quick way of seeing you page without showing bleed or margins is to press 'w' on a Mac, it toggles the view of them on and off (make sure you have no text highlighted otherwise you will just type 'w' in your text, click on the pasteboard first).
Hope this helps with the technical part. Like a mentioned, I'm not sure if you would export the pages showing the bleed or not, which is why it's not included in the file setup of the InDesign file but at least setting it up like this you have the choice.
Thanks
LizWebsite: lizardillo.co.uk
IG: instagram.com/lizardillo -
@lizardillo Thank you! I may try enlarging to fit the page templates and then checking no bleed, just to see what happens. I am no expert in InDesign and right now my pages are pasted very unevenly into the document, which is bugging me. Before I call it finished, I have to figure that part out. But first, the artwork.
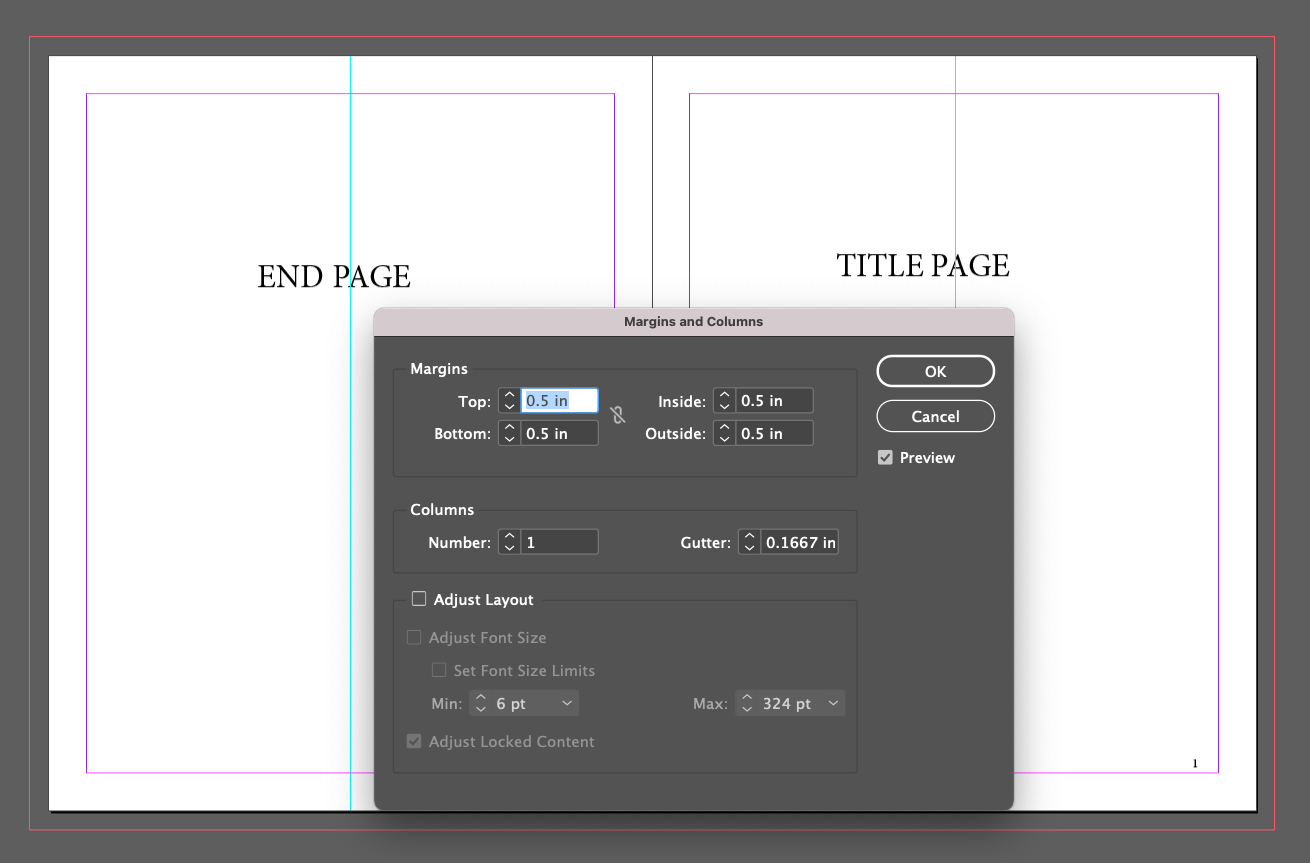
The pink margins: What are they margins for and how does that differ from bleed? Are they for text?
-
@LauraA you shouldn't need to enlarge your page if you have used the downloaded PSD as a template. It is set up to the correct size. Import it in at 100% scale.
Hopefully this can help you with your uneven placement...
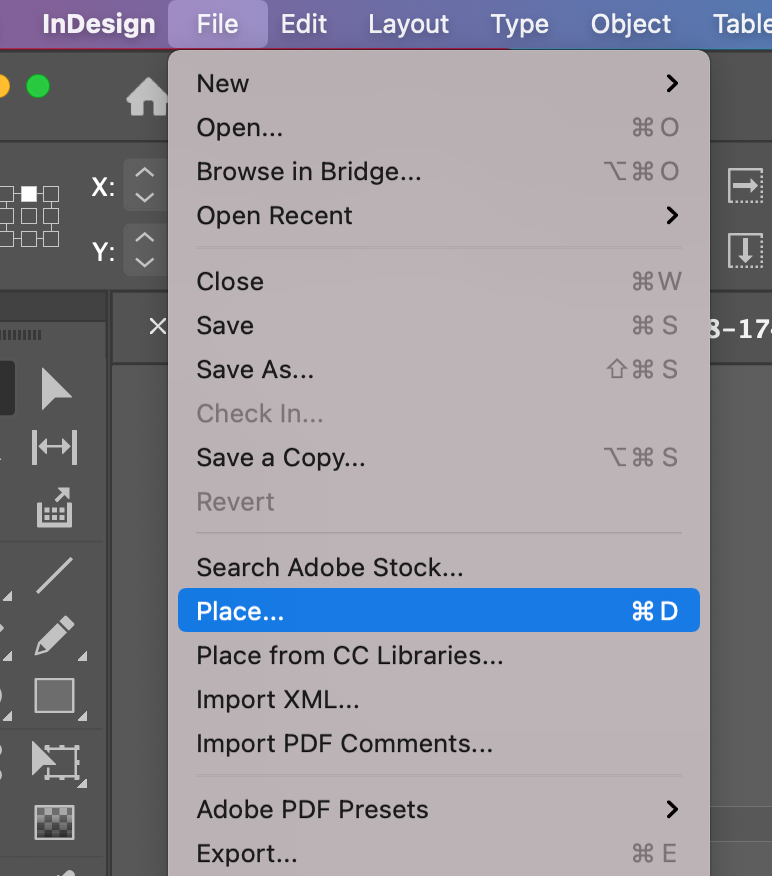
Open the InDesign file and go to File > Place
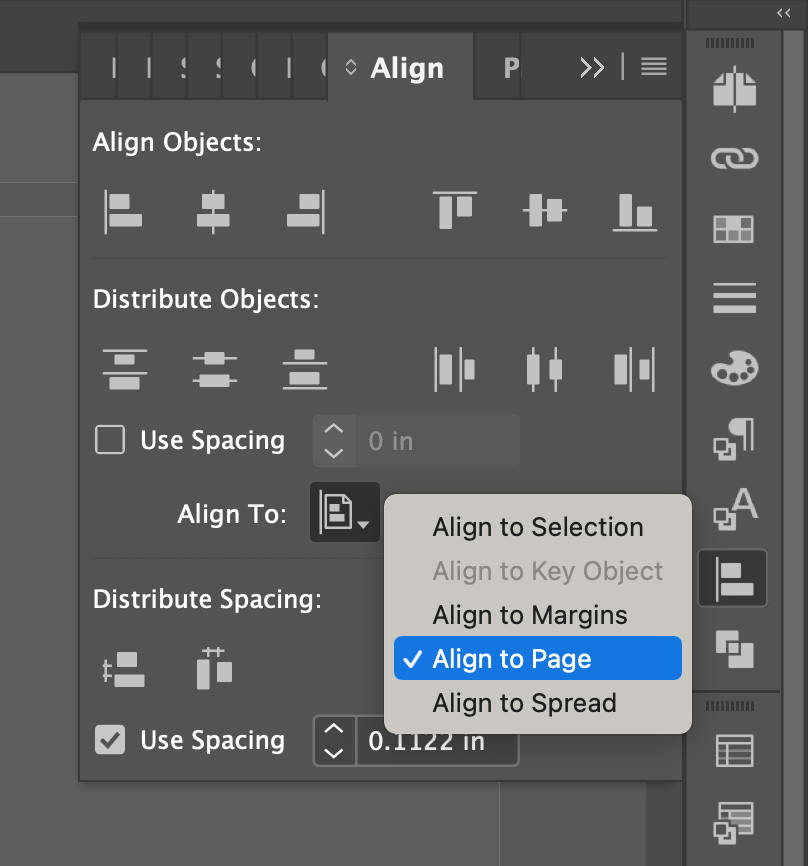
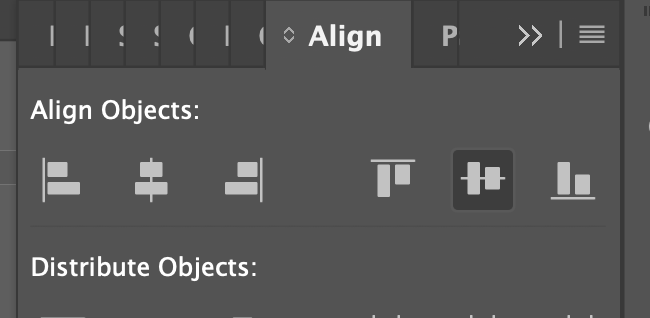
Then place your psd anywhere on the page. Go to the 'Align' window and set it to 'Align to Page'
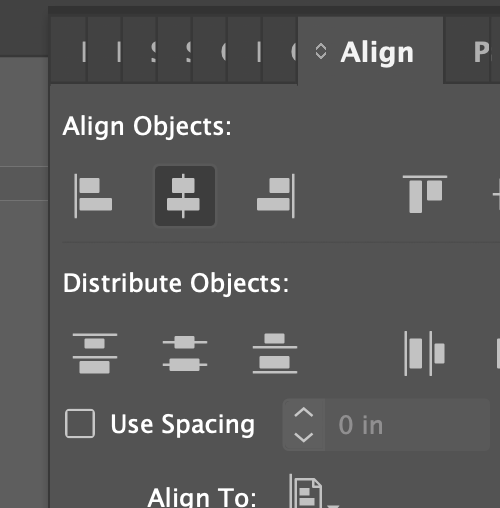
Then click the centre horizontally and then vertically buttons
This will centre the PSD on the page, you will see on this example, the pink highlighted bleed area hanging off the edge of the page correctly. (You would have this layer turned off when you bring your artwork in).
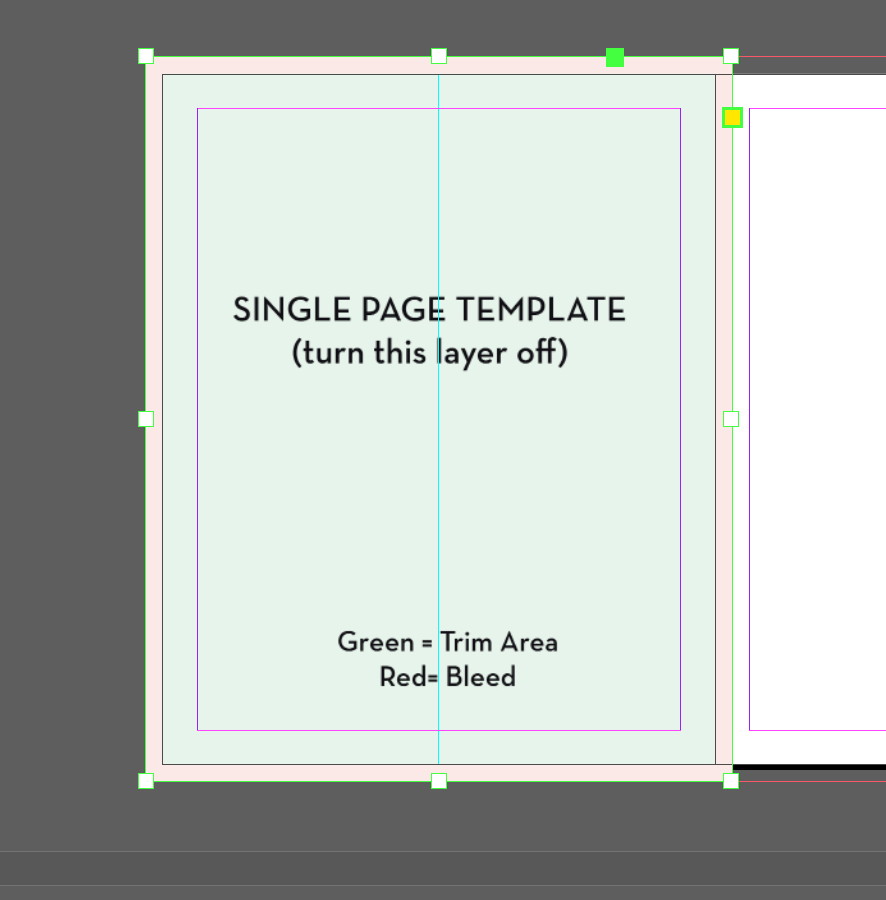
All you need to do now is pull the image box in on the right (or left if its a right-hand page) so it stops on the centre spine and no image is going over onto the other page.
Yes the pink margins are the 'live area' to keep important text/images/artwork inside of so they don't go too close to the edge of the page or get lost in the spine when bound.
Bleed is the bit of extra image that gets cut off when the paper is trimmed to size after it is printed. Anything that is in that pink area on the PSD file will be chopped off by the guillotine. There is a tolerance of about +/-2mm when paper is cut as it moves around slightly, so you need the extra bit of ink extending off the page if you have images/colour going right up to the edge.
Website: lizardillo.co.uk
IG: instagram.com/lizardillo -
@lizardillo Oh, wow! This is exactly what I needed to know! Thank you!!! You probably just saved me hours!

-
@LauraA no problem. If you need more help with anything then feel free to tag me or send a message and I’ll see if I can help. I’ve been using InDesign for my job since about 2005-6(?) and Quark Xpress before that (yes, I’m that old
 ).
).