My first attempt at traditional timed figure and gesture drawing
-
Very nice sir! Love the work you are doing.
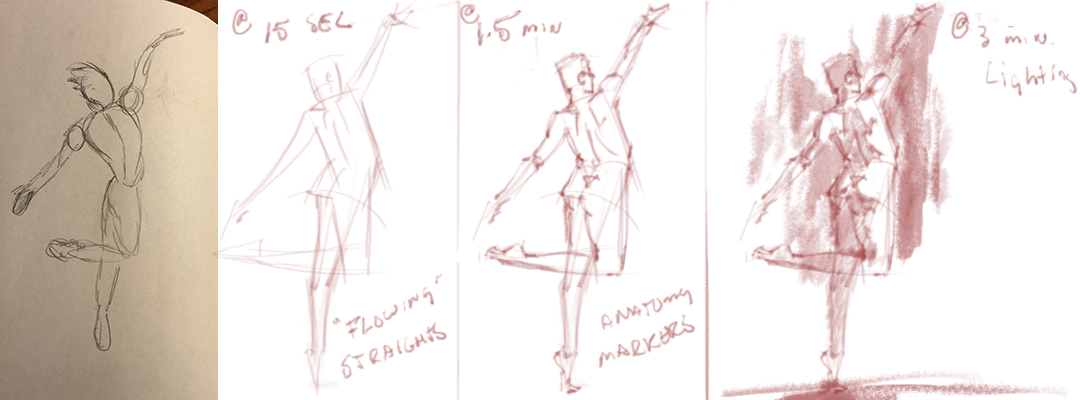
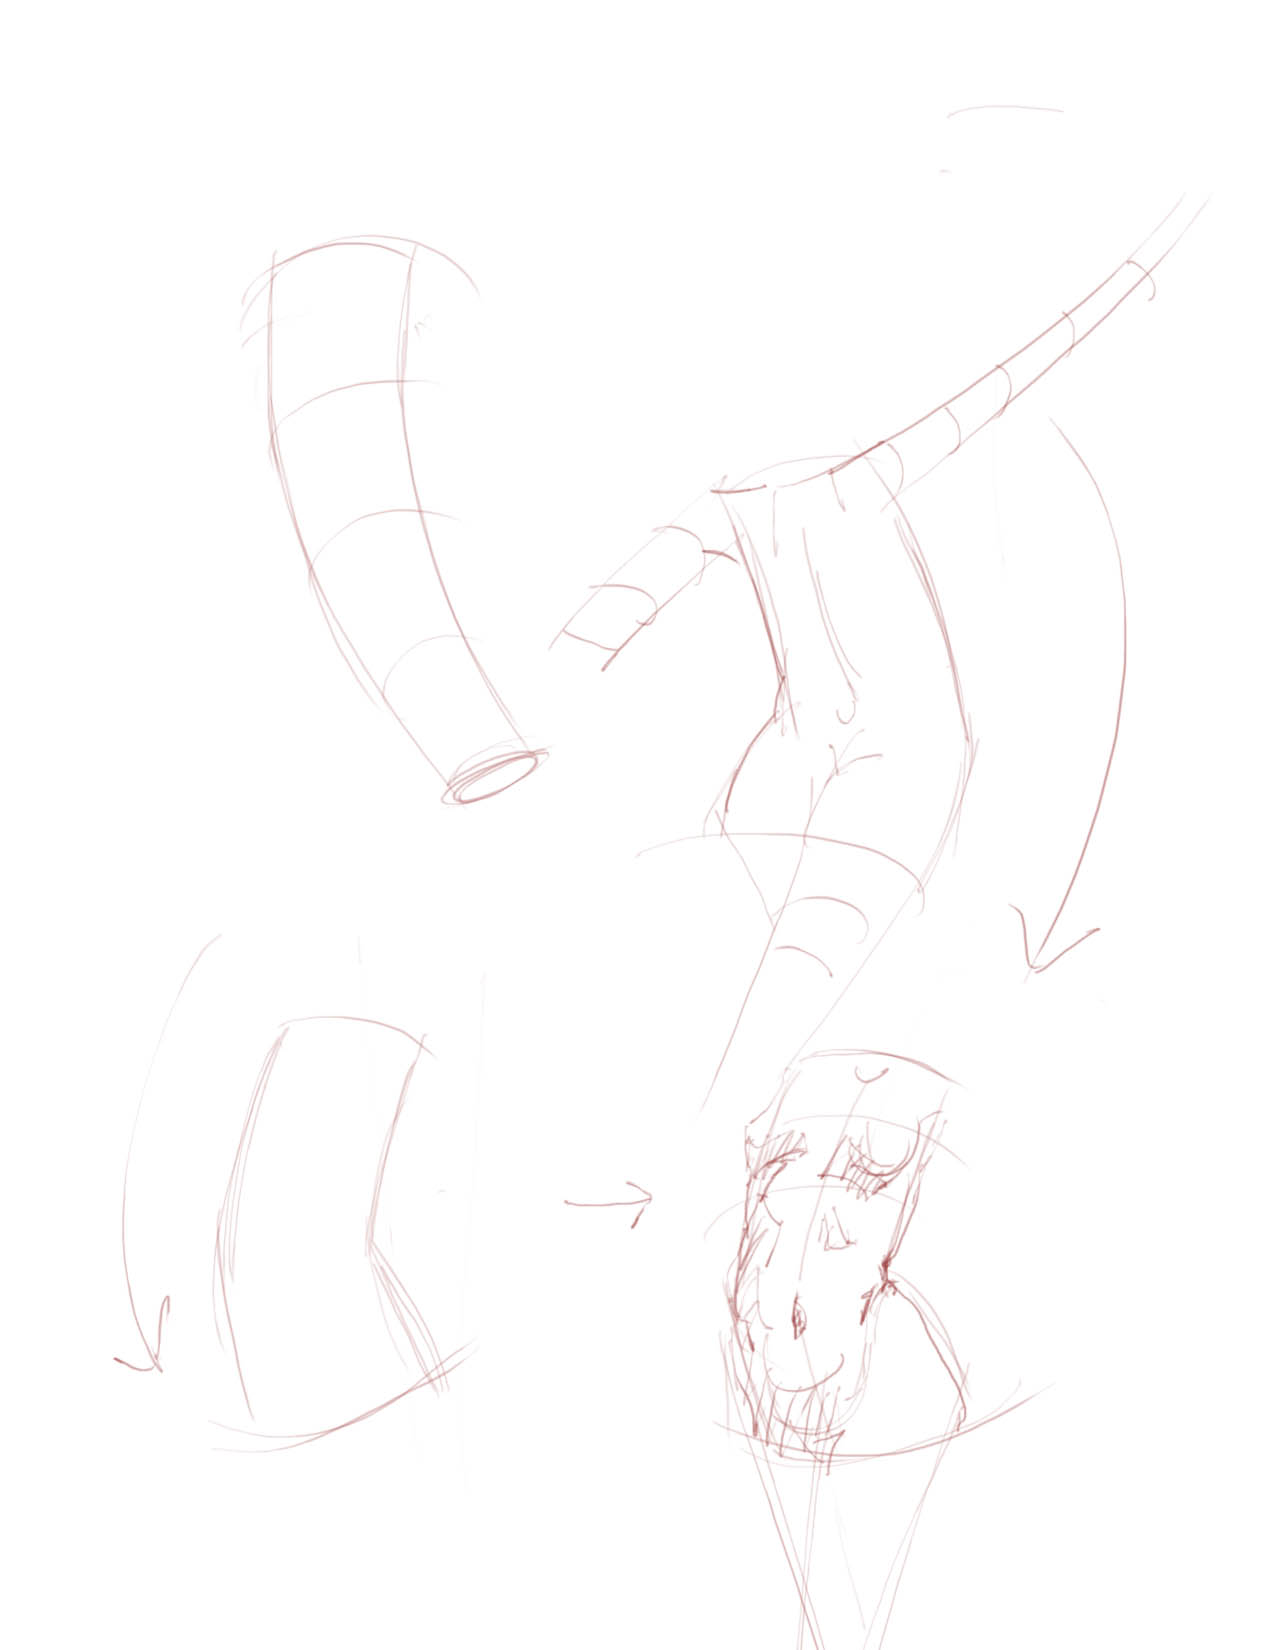
Couple of suggestions. You may want to start with a bigger gesture line to really capture the action. The way I recommend practicing this is by drawing slightly curving straight lines (which I call "flowing straights"). The first couple of lines can really sell the pose and deal more with the direction of the figure which forms are then built around.
You are starting with more individual forms which works of, but can add a stiffness to the figure that is hard to get rid ok. I did a quick demo of how I approach the figure in a 3 minute pose. You can see what is added at 1 min, 2 min. and the full time.
The second page just shows those 'flowing straights' that I think work very well for the figure. Glen Vilppu is the man to check out in terms of nailing the figure with a good action line and gesture.
Let me know if you have any questions. : )
-
@Lee-White this is going to be so unbelievably helpful to me. I can see immediately what you mean about using flowing straights to begin and then building up from there.
And this type of professional encouragement and support is what makes this forum so invaluable, can not tell you how much I appreciate the time you took to write this up and provide the samples for me to reference.
I am looking forward to posting an update after I try it with these techniques!
Thank you so much,
RIch -
great to hear that it will be helpful. I can do some more demos for you later today based on your sketches if that would help. I need to get a book out the door and then I'll work on a few.
-
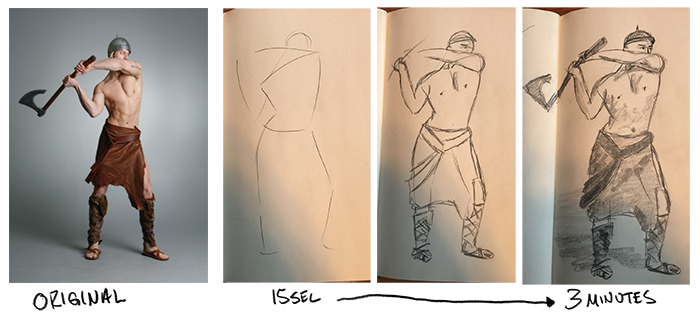
So I reviewed what @Lee-White had shared on here yesterday, again this morning, and then I set out to give the method my first try.
I can tell that in my 15 sec flowing straights attempt - that I was still way too hesitant and my lines are not quite flowing yet, nor did I get many of them down on the paper. I think this will come with continued practice and confidence in those lines.
From there I continued to build upon the lines - and I think it was about 1.5 minutes or so at that point. And I also see (after going back now to look at Lee's example) that I was worrying to much about some of the specific details and it really feels even more stiff overall after this step.
Then for the rest of the time I had left I worked on the remaining details and shading.
I had just gone with the first image that appeared on that figure drawing challenge site but next time I think I will skip ahead and try to find one without the added props - as that somewhat defeats the purpose of understand all of the forms and also getting me to let go of trying to capture those details.
Also, I need to just keep myself focused on those slightly curving straight lines and get those down better and then build up from there.
Clearly still a whole bunch I need to keep working on, but it feels good to be going about this from the ground up!
-
Fantastic work Rich - it’s so great that you are putting the work at this level, it is really going to pay off! I think you captured his gesture and essence really well - he looks like he is really going to swing that axe

-
there ya go buddy! Making quick progress here!
-
@Rich-Green This is great stuff. I've been wanting to learn to do gestural figure drawing like this, so this thread is motivating and helpful!
-
@Rich
I think it's important that after you've done the quick gestural, to also try to develop some " muscle memory " and by that I mean, lines that become second nature in drawing figures or anything after drawing them several times. I've tried to do that here by doing a smaller study AFTER drawing a 3 minute gestural.
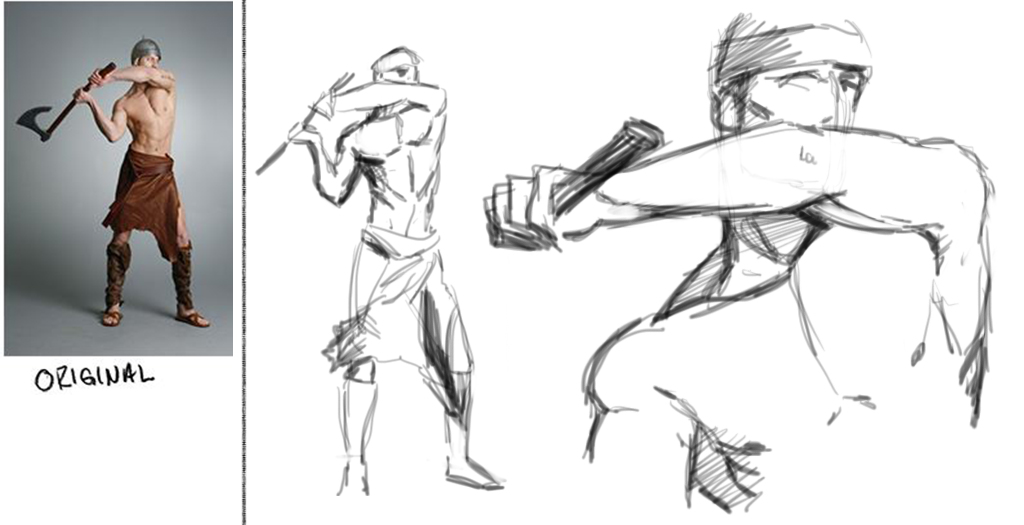
The reason for doing this is, you're breaking down the lines into more data by drawing them over and over, by studying the figure, and making a close up. When you go back to drawing figures in this same pose, you'll remember both. The gestural drawings you made to capture that kind of pose AND the study you did to give your brain an in depth idea of what lines would make up a larger drawing.
Combine that and see how you draw this figure over... you will be able to over simplify, because you know the lines to cover, and your drawing will have more uniformity, because you've blocked out composition on a larger scale.
I only drew what I considered to be the hardest part of this piece, that weird arm, I could have faked it with my own knowledge of anatomy, but I wanted to try it only from your image, which I blew up even though it was incredibly blurry. And since it was, I only had the most rudimentary of details to pull from.
Try this out and see if it helps,
- draw your normal gestural for 1 minute, then 2 then 3 minutes from a source pic.
- draw a study of the area you found hardest to compensate for, with an enlarged pic, concentrating on the building block lines, and the
shadow areas to give it form. - Now redraw the figure again at normal size, with the memory of both the gesture and the study in your head.
And if you can find a new pic with the same pose, draw that instead. I think you'll find your final piece to be more successful. Good luck!
-
Edit: Sorry I wanted to add, don't get hung up on the study, and don't spend more than 3 minutes on it. The idea is to give yourself a larger work space, without having to do a complete drawing, and you're only working on ironing out the area you originally found hard to understand in the full gesture drawing.
If you found this was helpful, do studies on the other areas, then piece then together in your brain and do a full figure but again only 3 minutes. Because what you're trying to develop is the thought process you did to do both exercises as one exercise. What is a full figure but a series of connected studies, others simply work faster, more simpler than we do... I hope that helps.
-
@Bobby-Aquitania Thanks so much for the nice and detailed write up - as well as the sample drawings Bobby. I will definitely work through some practice studies using this method you outlined and I also like the part about going back and doing a focus on the area I found the most challenging in the original attempt. I will be sure and post what I come up with!
-
nice studies and progress
-
@Naroth-Kean Thank you!
@Steff Thanks! You should definitely give it a try it's fun and is really helping me!
@Dulcie Thank you - I really appreciate the support!
-
I find that a lot of the time, instead of pushing a pose to add drama/force, people tend to not even push it to the point of even the real figure/photo and it ends up a little lifeless.
Ace
-
@Ace-Connell - yes I know I am guilty of doing that and I have seen that in other work all over social media - the more I am becoming aware of what to look for and pick up on. One of the biggest things I have taken from the SVS courses and these forums - its to really be an observer of life, your surroundings, environment, objects, colors, lights etc, etc etc. I catch myself picking up on things I never would have paid attention to before - and more now than ever snapping a quick photo with my phone to capture a composition I find interesting in the real world, or a color of the way the sun hits a tree and snow around it, or a texture I think I may be able to use in the future and so on.
-
@Rich-Green I love that! That's awesome!
-
@Rich-Green said:
I catch myself picking up on things I never would have paid attention to before - and more now than ever snapping a quick photo with my phone to capture a composition I find interesting in the real world, or a color of the way the sun hits a tree and snow around it, or a texture I think I may be able to use in the future and so on.Congrats Rich, you have officially been hit by the art bug! When I finally made a break through in digital art, all I could see in people's faces were how I would draw them given the chance. And I couldn't turn it off no matter how I tried. I just kept noticing color palettes and highlights, and it was everywhere just like you describe it above.
I hope you always feel that way!
-
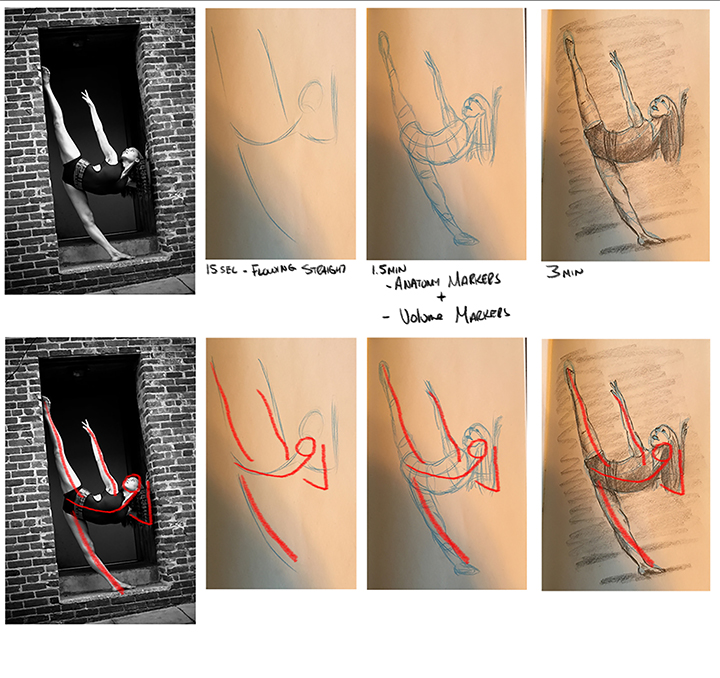
Worked on another gesture practice. I can really tell I am still very stiff with those starting flowing straight lines and once that happens the entire image suffers from looking stiff.
But that is what is so great about this kind of practice is that I can now see this happening and the impact it is having and I have something I know I can work on.
For the 1.5 minute anatomy markers I also pulled in a bit of the volume markers per the other video classes from Will and Jake because I am also working on perspective practice a lot here as well.
After I was done I pulled this all into Photoshop so I could post here and in doing so I decided to trace the original photo's actual flowing lines and then I copied that over my various phases. My analytical brain loved this because I can see even more clearly where the lines should flow in comparison to what I had drawn. I found that quite helpful and it highlighted more bends and angles I do not think I picked up on in her torso. Really interesting to me.
-
Thanks for sharing this! I think I'll go try it too
