Level 1: Lesson 2 completed.
-
Thank you @davidhohn for the lessons!
I loved doing them. Its a bit of an overlap with lesson 1. But I guess thats good as it forces you to repeat things.
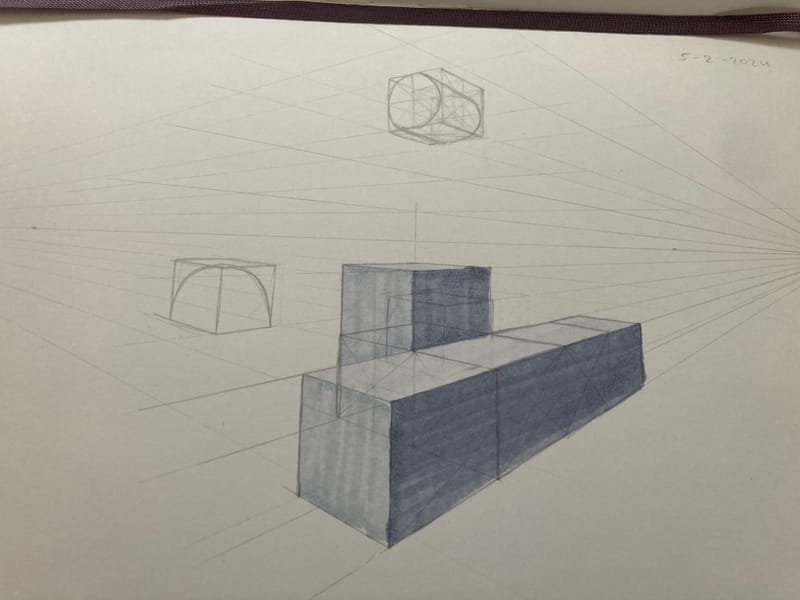
The first blocks in 1 point perspective.

Some drawn building blocks and continuation of blocks into perspective planes.
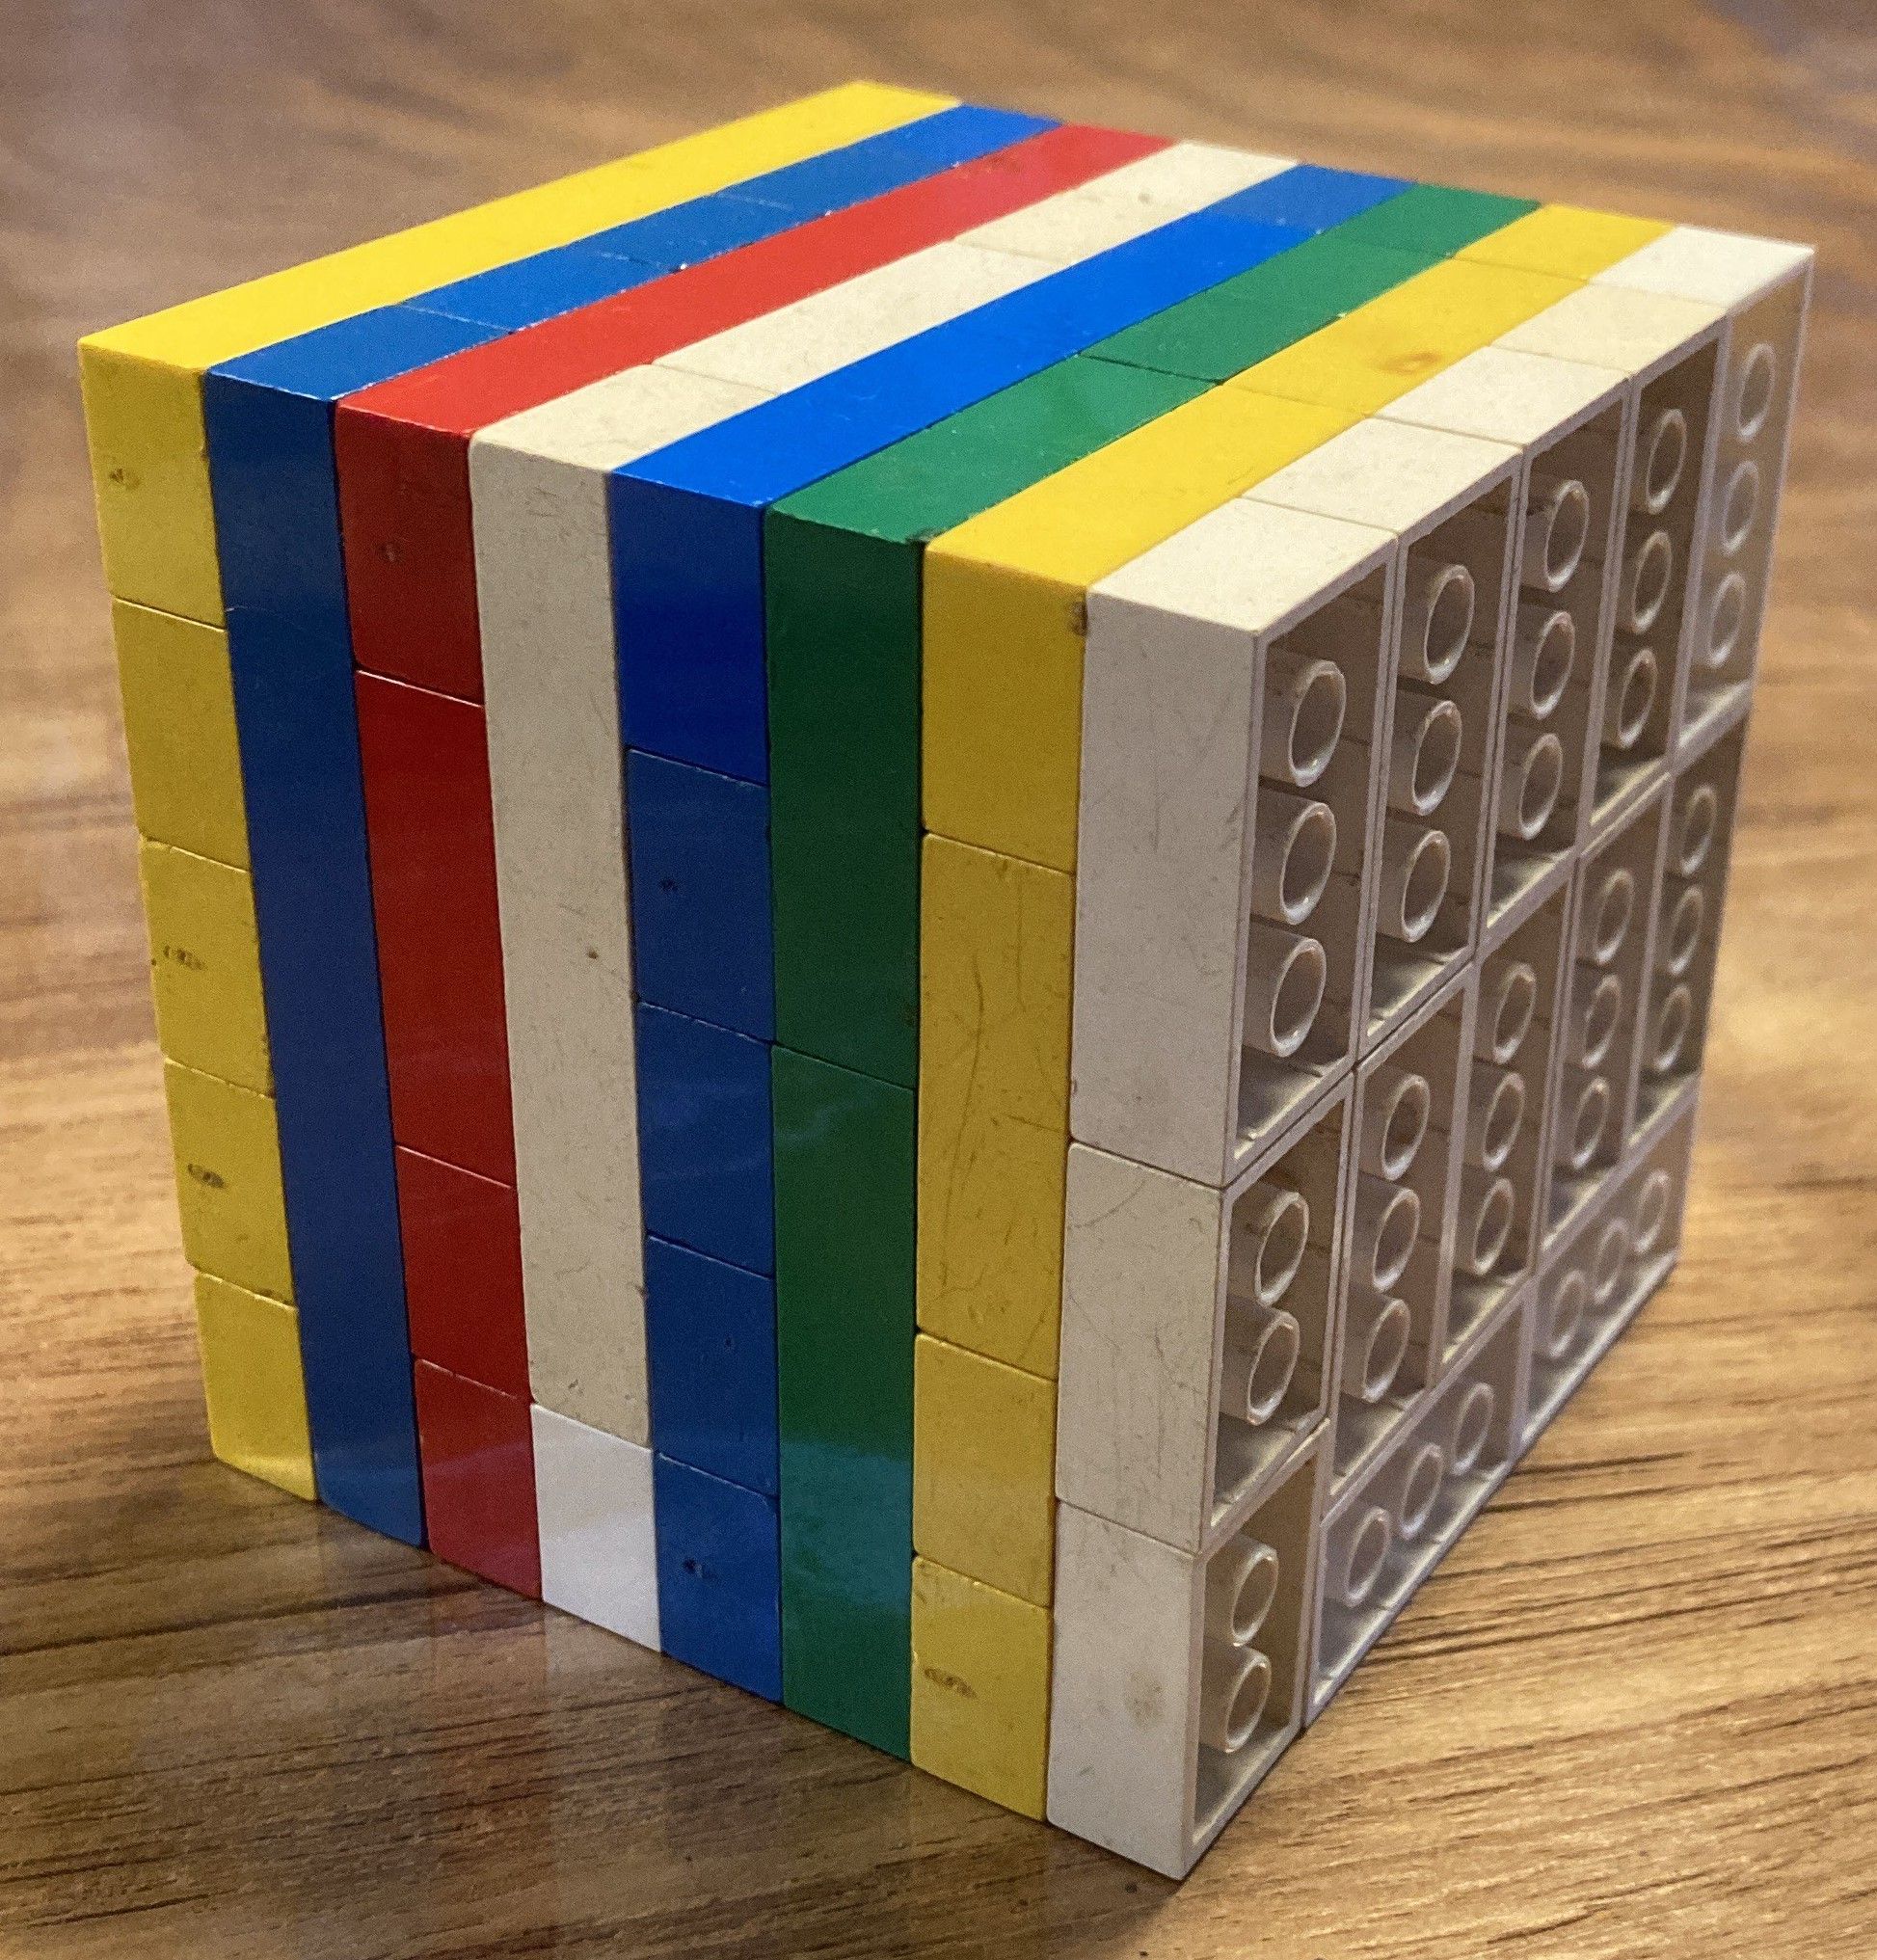
I even builded a lego cube for drawing from life with the blocks. Much fun! And it really helps to see the perspective and planes in the correct sizes.
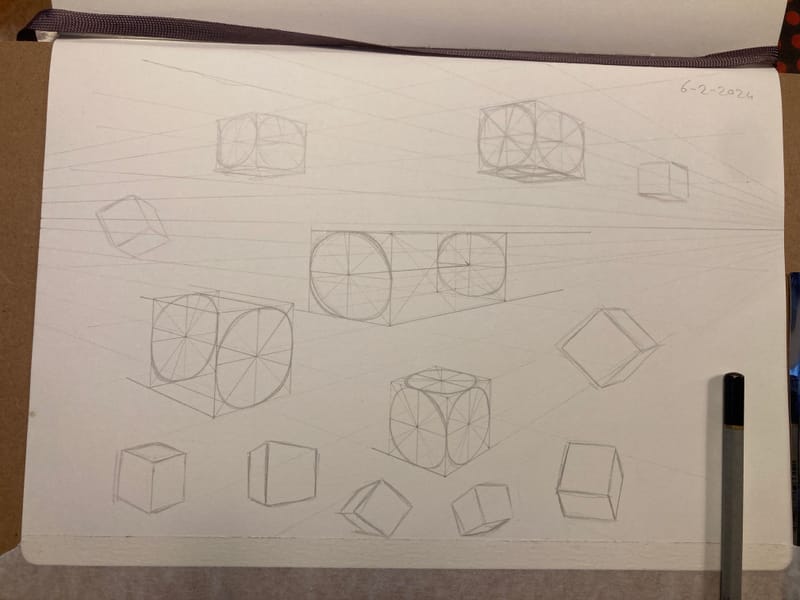
Circles in perspective, and more squares!
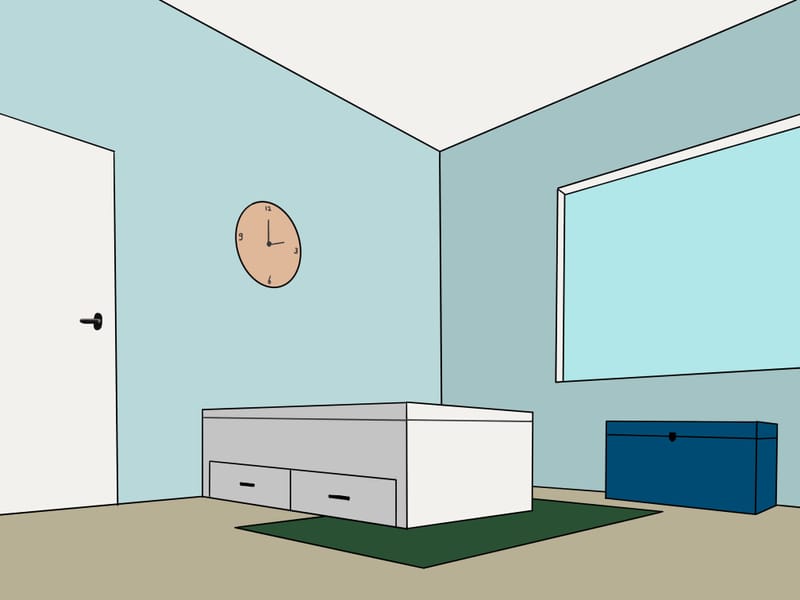
And the sketch for the final assignment.
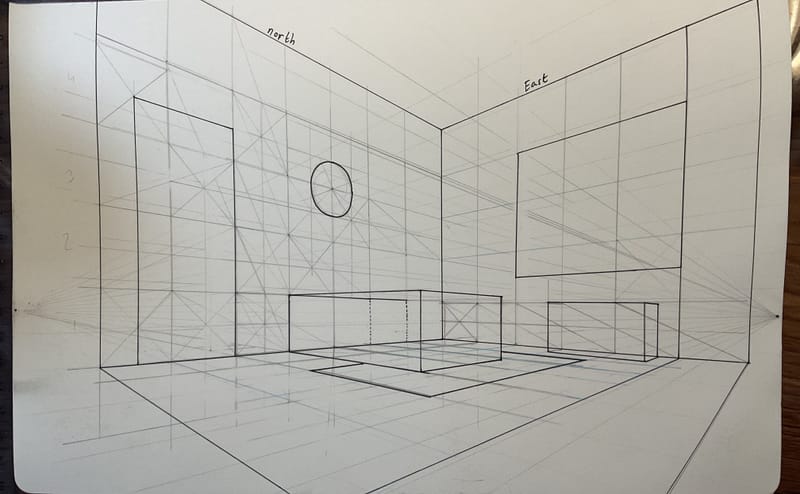
And the cleaned up version of the final assignment. Even added a little color. I see now that the linework is a bit distorted because of the picture I took and worked on top of. But the idea is there ^^ And the perspective lessons clicked for me, so thats good. Even the clock was near perfect drawn. So I was rather excited about that!
Any tips / feedback / comments, all welcome!
-
@Avondrood-art Nicely done!
Definitely worth it to make the lego "cube" to use when drawing in perspective. IMO it's MUCH more valuable to draw a cube than simply drawing rectangular boxes in one, two or three point perspective. When practicing always double check your drawn cube against the real life cube to make sure you are training your eye to see (and adjust) the proportions of drawn cube.
Your room is solid! Especially if this is your first go.
That said, make sure you are moving your vanishing points faaaaaaaaar away from each other. Currently, orthogonals for both points are converging too quickly giving the room a "fish eye" look. To fix, simply pick either the LVP or the RVP and move one of them further away (perhaps 8" - 10")Keep at it! Have fun! Make perspective a tool that you can use to create the kind of images YOU want!
-
Thank you for the reply!
The first drawn boxes are really wonky. I'm trying to draw more boxes in perspective and check them with the real one.If you're drawing on a table, in a sketchbook, how do you practically add the vanishpoints so far? Or do you eye it then if they are so far ?
On the ipad its easier, as you can just plant it down and zoom out.Thank you ! I've now started lesson 3 of lvl 1 of the main course. Also about perspective. And already I feel I know a lot more now. So thank you for that.

-
@Avondrood-art said in Level 1: Lesson 2 completed.:
Thank you for the reply!
The first drawn boxes are really wonky. I'm trying to draw more boxes in perspective and check them with the real one.Time well spent! I only commented on these because (as I recall) Will's earlier lesson on perspective focused on drawing "rectangular boxes" in perspective. I specifically encouraged drawing "1 unit x 1 unit 1 unit cubes" since they can be used as a measurement tool.
If you're drawing on a table, in a sketchbook, how do you practically add the vanishpoints so far? Or do you eye it then if they are so far ?
When you start out -- no. Don't eyeball the LVP and RVP. Simply make your paper bigger. Tape a couple sheets down or work on a bigger drawing board and put in a pin for whichever (or both) vanishing points are way off your sketchbook or drawing page.
Also, don't overlook the value of a good old fashioned photocopier! Make your initial sketch really small on the page, which will give you more space to move the VP's further apart. Draw a few orthogonals and then enlarge the thumbnail sketch and perspective grid to a larger size. Then simply follow the convergence of the orthogonals.
On the ipad its easier, as you can just plant it down and zoom out.
True. That is a distinct advantage of working digitally.
Thank you ! I've now started lesson 3 of lvl 1 of the main course. Also about perspective. And already I feel I know a lot more now. So thank you for that.
Have fun!