April WIP brings May.... Robots?
-
@carolinedrawing all kinds of stuff! Clay, wire, fabric... I’ll definitely post WIPs!

-
Wow, big challenge! I like pose 2, can't wait to see what happens!
-
@EliaMurrayArt so fun!!! I think 2 works better. It took me a little while to figure out what was happening in 1.
Love it
-
@gavpartridge I really appreciate you saying this. Fortunately, since building takes some time, I'll definitely put some thought into it as I work on the Lisa puppet and see what I can come up with!
Thank you for taking the time to look at my website and giving me a push - it really really is appreciated haha sometimes we need a kick in the pants.
-
@gavpartridge hahaha I LOVE that you think I could work for Pixar! And please don’t feel embarrassed or like you can’t comment. We are all here to learn and I don’t know a single artist, no matter how high up in the industry, who doesn’t benefit from another set of eyes.
I am a fully employed artist, but I do not work in illustration/animation. I work as a designer and painter for a small company that works primarily in the hospitality industry (so a lot of abstract art haha) My dream would be to work as a full time illustrator. Hopefully someday. But I am still learning and growing. I hope I will always be learning and growing and never become too “big” to take criticism.
Besides, you’re correct. This is a bit of a lazy shot at this concept haha but I am also very nervous about building a robot puppet
 and so I blew it up to avoid having to actually build one.
So I will give this a good hard think and see what my brain can come up with.
-
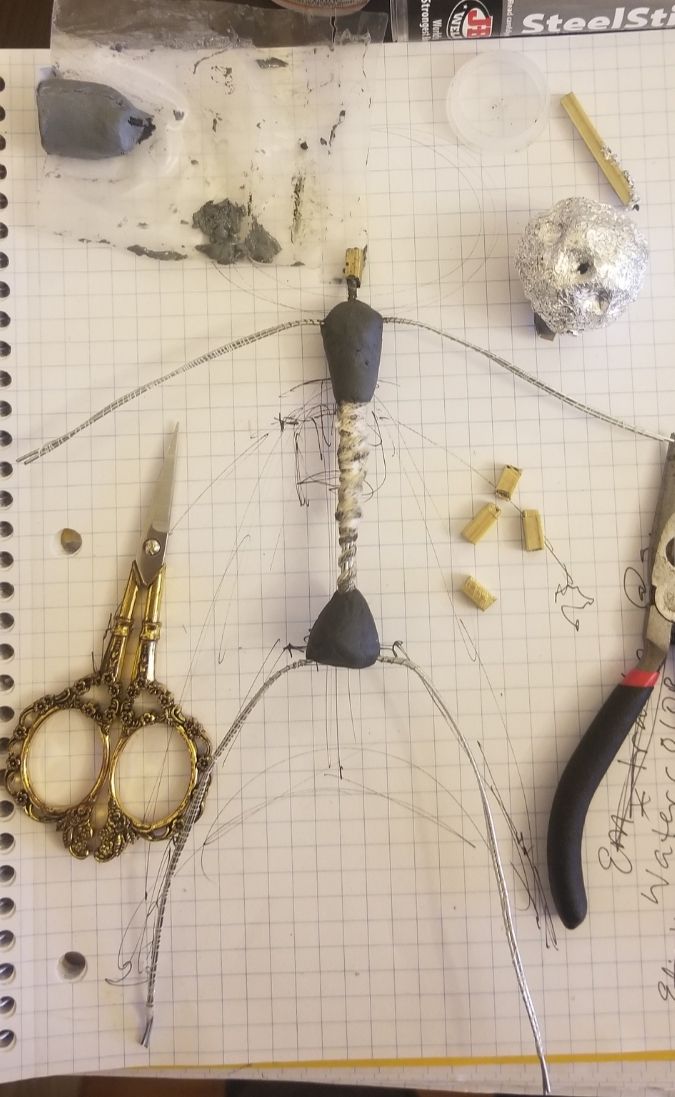
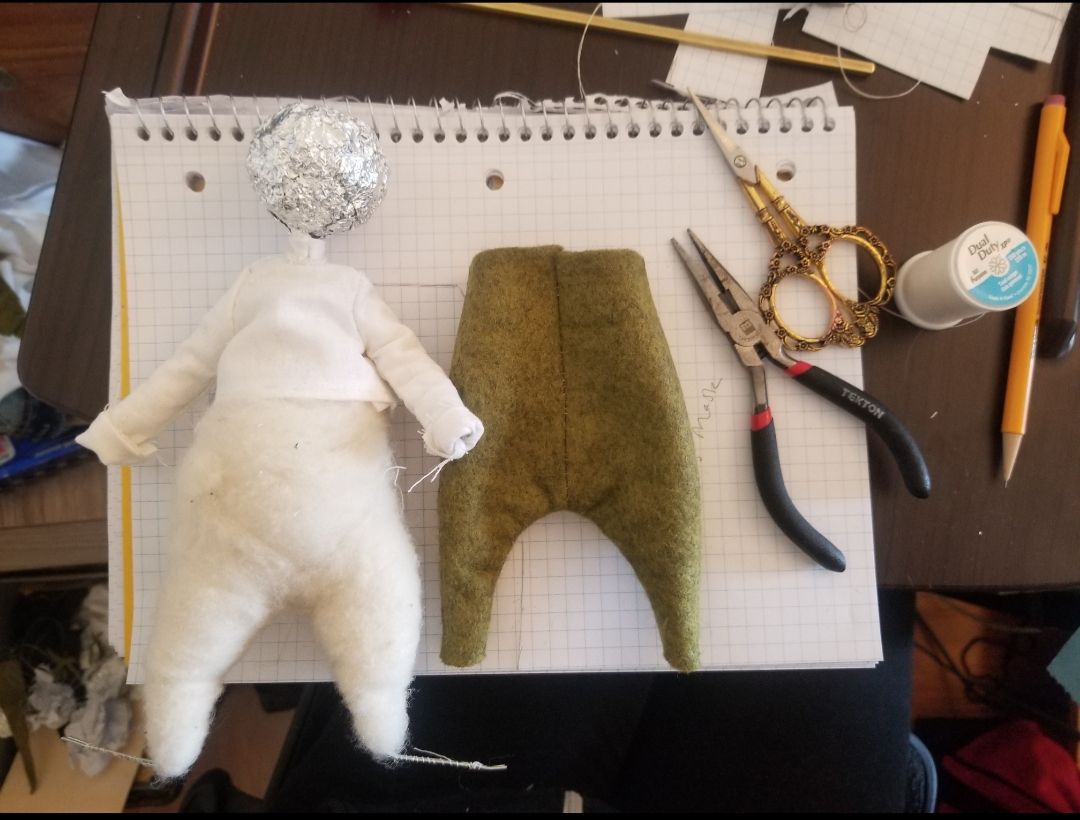
Step 1: building the bones of Lisa


Edit: a little info on what I'm using/doing.
Starting with the armeture. I like using 20lb wire, and depending on the sculpture I double or triple it up - parallel to itself and wrap it in thread. I know some people twist wires together, but I find that that can weaken the wires. So by using them parallel and binding them with string you can actually get more bend with them, and if one happens to break! Well you've for a second one still usable. With bigger sculptures I'll sometimes line up lots of little wires together in a bundle like this so that it is extra strong. (Think like a bundle of sticks)
I use steel stick to create a "rib cage" and "hips". This is kind of toxic, so please use gloves and in ventilated area.
I use square brass tubes (large 4.76mm and small 3.97mm).These nest into each other to create wrists and neck joints. These are extremely useful because then you can replace the heads/hands. But even more important, you can take the head and hands on and off so that you can fit shirts on!
-
@EliaMurrayArt I’m excited to follow along

-
@EliaMurrayArt I just visited your website and saw you do needle felting. I’ve done a bunch too. I have so much wool right now . I should start doing some felting again!
-
@Coley Omgosh you totally should!!! I love needle felting - I have a separate instagram account for needle felting - @eliamurraycreations. I'm TERRIBLE at posting on it. especially because I've been really trying to focus on my illustration work more. But I LOVE needle felting and sculpting in general!
-
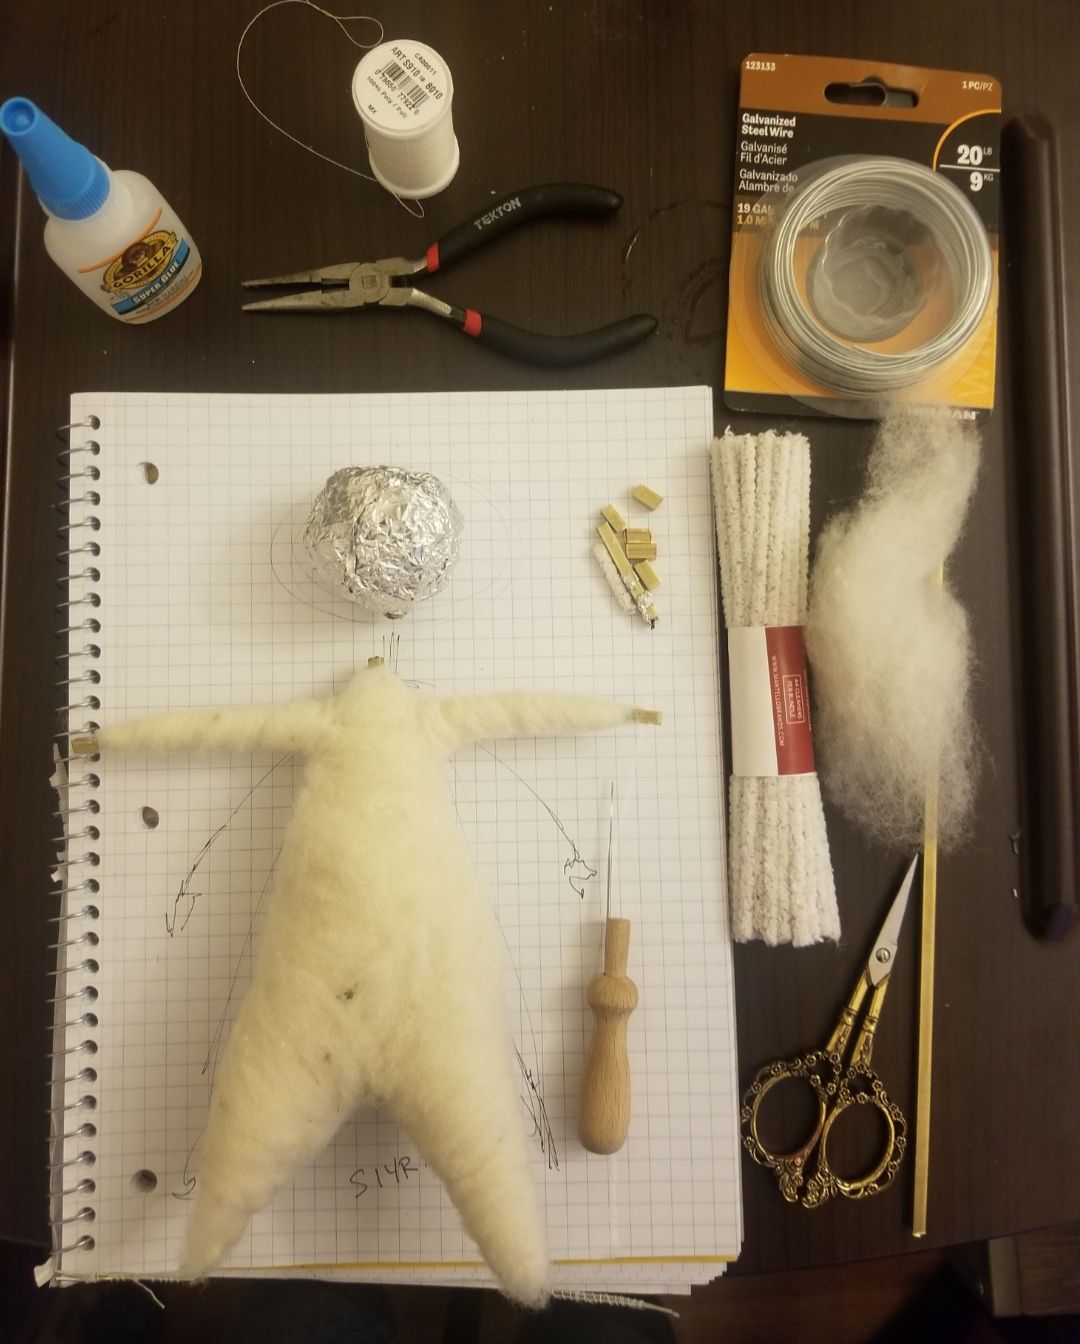
Step 2: fill out body with wool! I like using the wool because I can kind of sculpt the body with needle felting.
Wondering if people would like me to explain what I am doing? Or just see the photos? Because I could go into more depth with tools, techniques etc. But I don't want to yammer on.
-
Yammer away please! I’m really interested! I just looked at your amazing needle felts, they must have taken weeks to do!
-
@Coley thank you! Yea most of them took quite a chunk of time. I find them so relaxing Haha
-
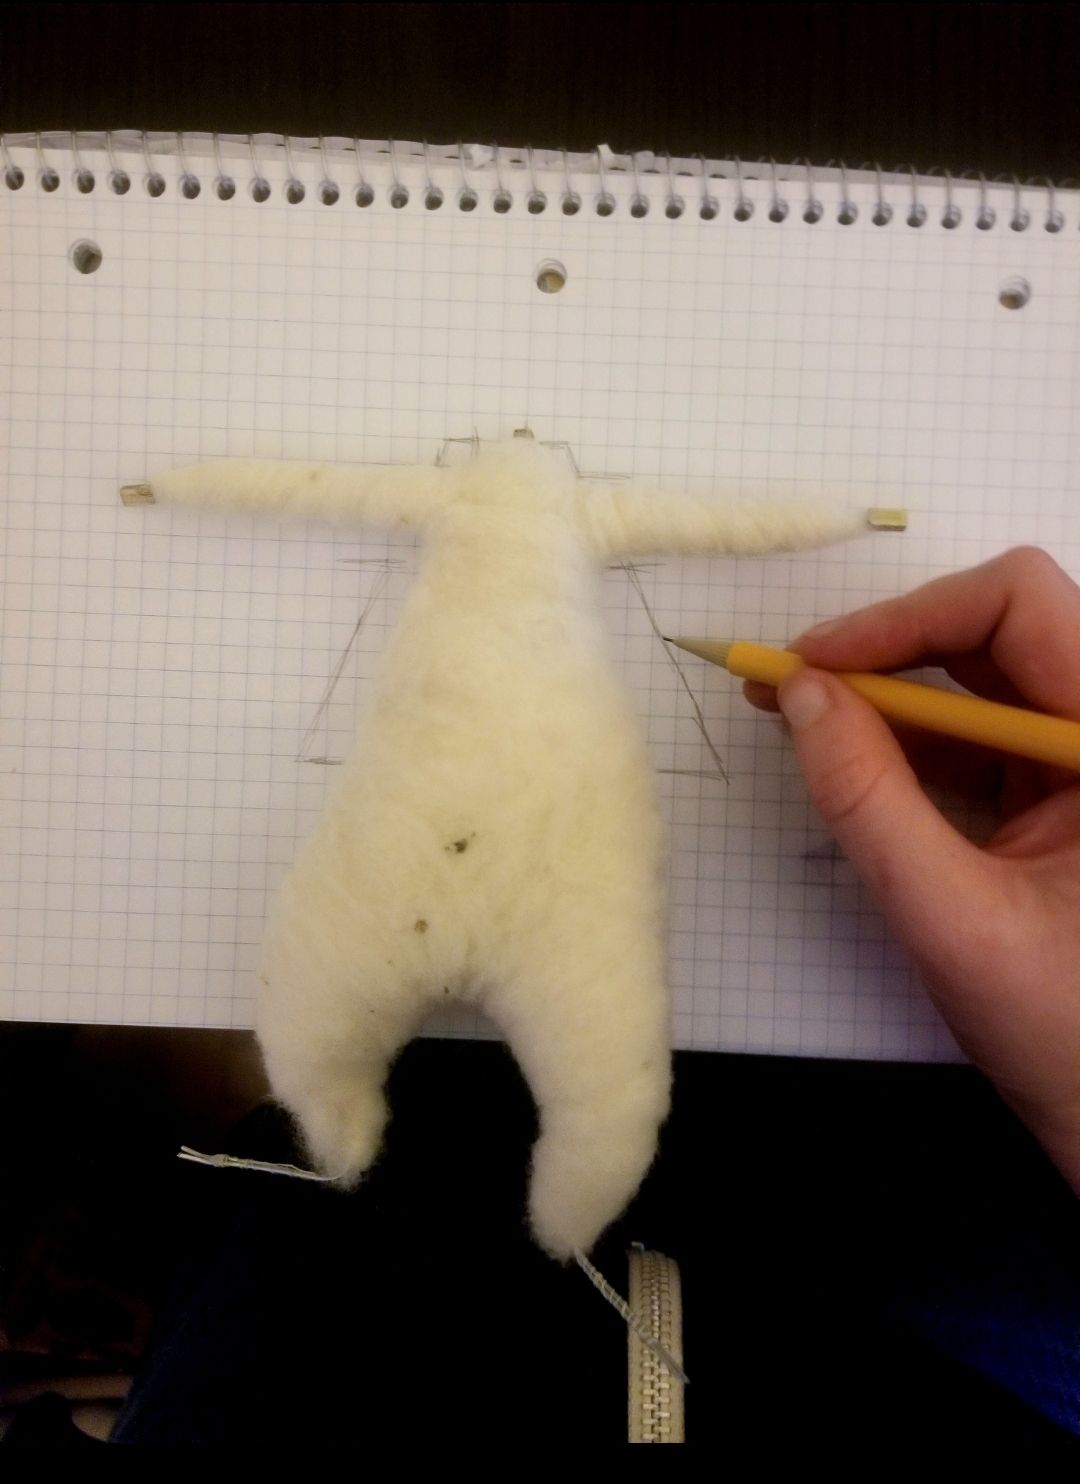
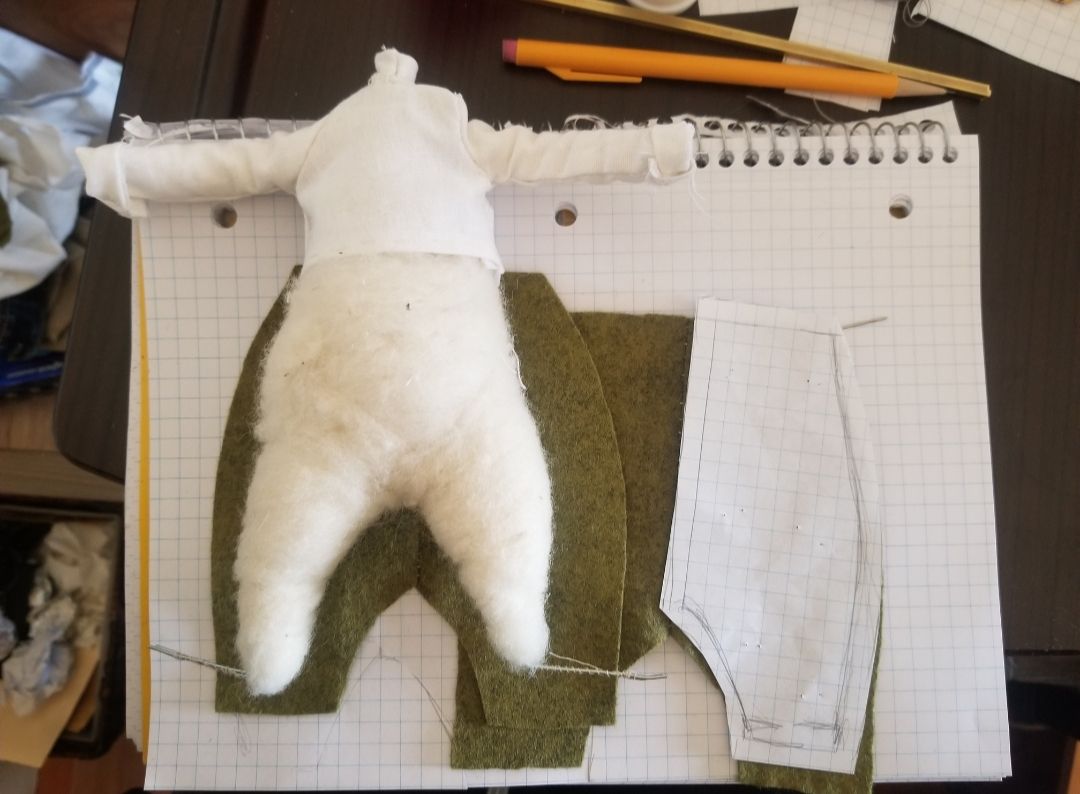
Step 3: Drafting the clothing.
For this step, it is a but of trial and error for me at my skill level. As I am not great at drafting garments. Fortunately at this scale and for this type of work I'm not too concerned with it being perfect. It just needs to fit and look like a shirt.So I've marked where I know I want the shirt to end (plus some length for hemming) and where the sleeves will go and hole for the neck. I like using graph paper because it can help measure and keep things straight but any paper works.
Then I cut the paper out and lay it over folded fabric. This wag when I cut it out - I'll get two of the same piece to stitch together!
-
@EliaMurrayArt are you using fabric for the clothing? I see the bandaid, hope you didn't stab yourself with the felting needle
 that hurts!
 -
@Coley hahaha no! I didn't, fortunately, though it has happened many times. Especially with needle felting. My fingers are always a total mess. But yes! Fabric for the clothing.

-
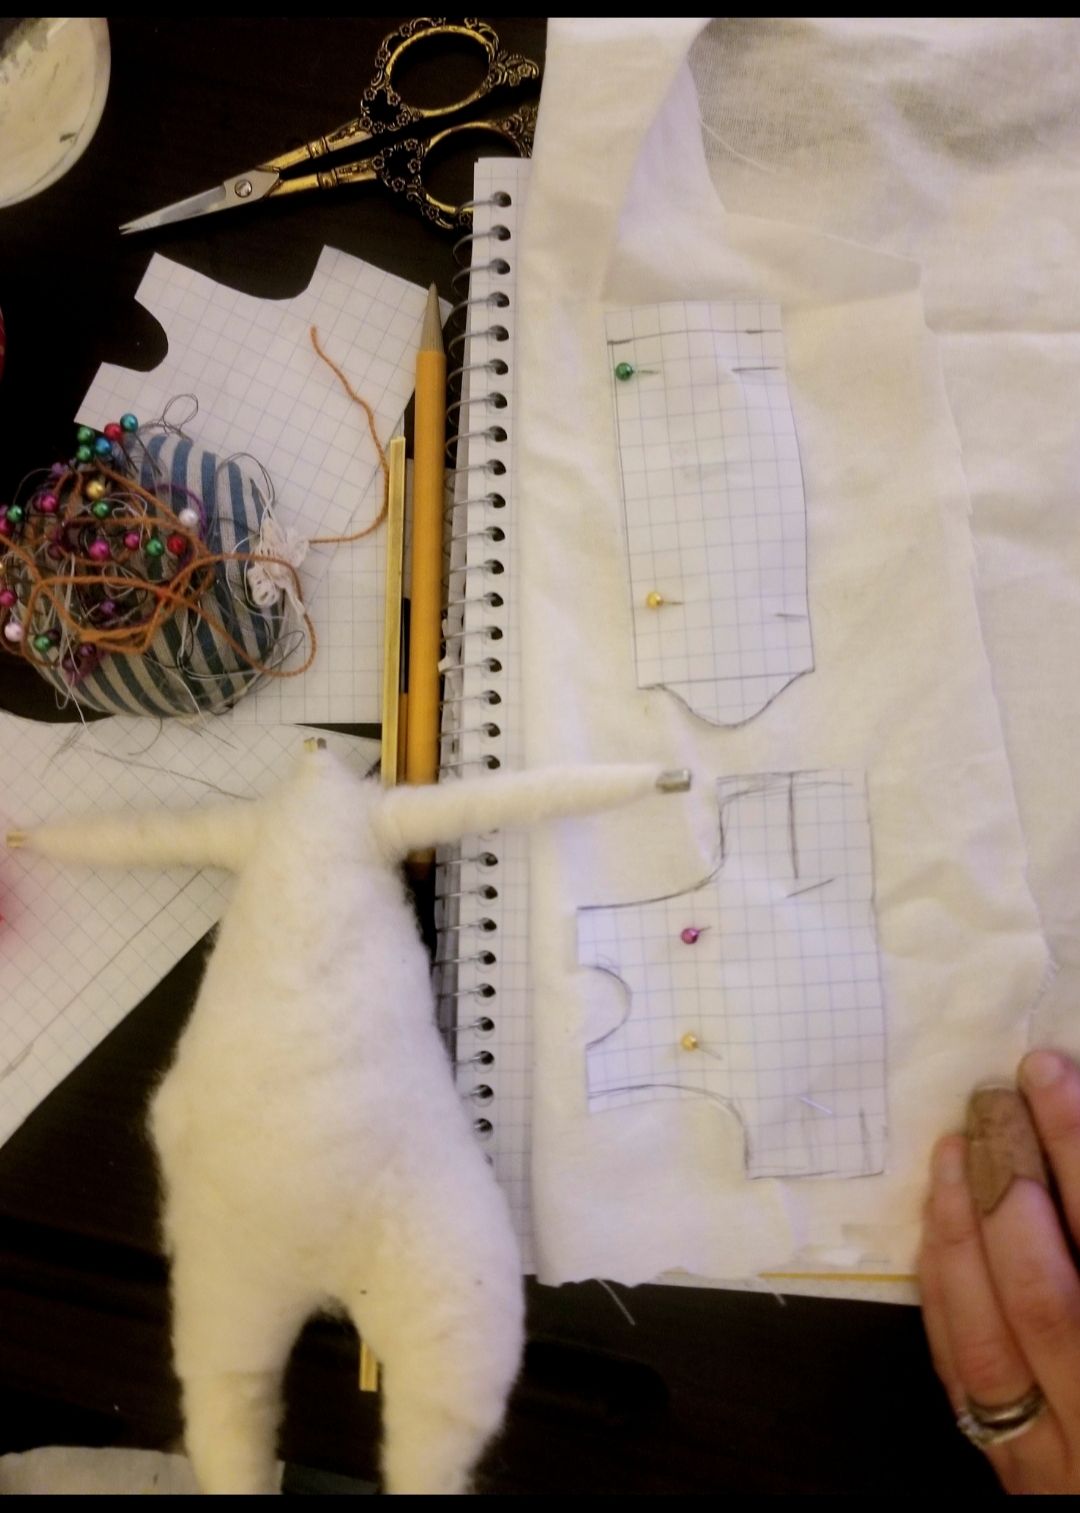
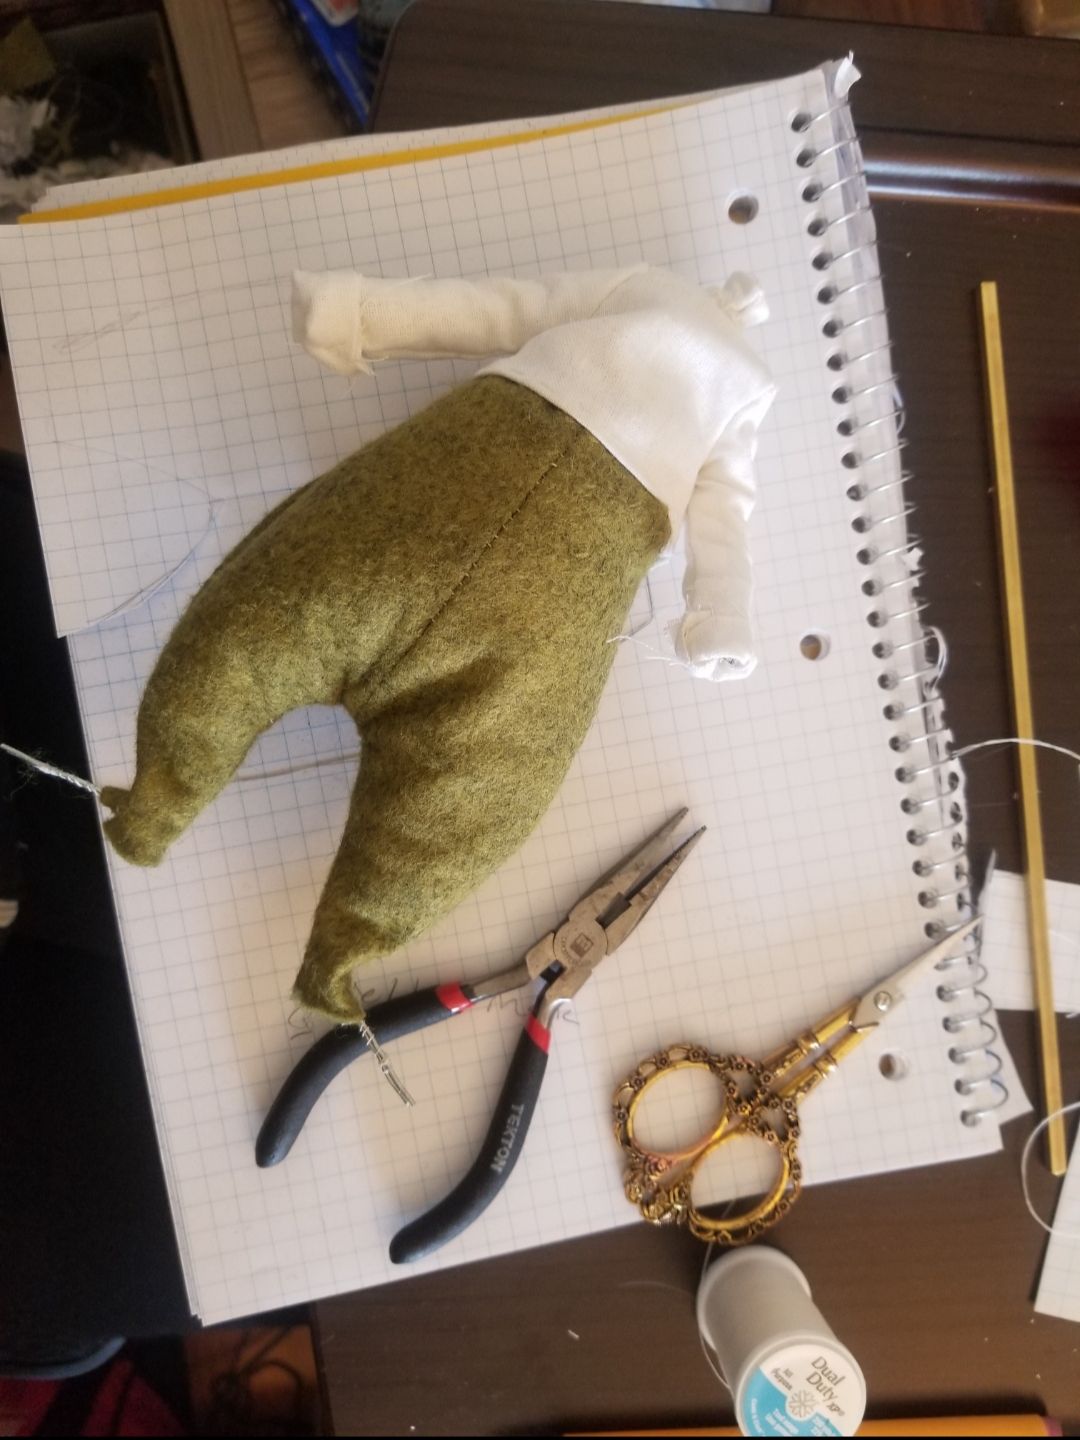
Step 4: Clothes are drafted, pinned to fabric, and cut out and stitched. With about 1/4 inch border for stitching.
Sewing clothes this size is pretty fiddly business. And then fitting them over the arms and legs is always a struggle but they don't have to be perfect! You can always stitch them directly on the body and just have the threads visible.
-
@EliaMurrayArt originally I was thinking you were making a maquette for drawing from. But are you instead photographing your sculptures as your submission? Pretty cool either way!
I’m feeling tempted to try mine in paper mache and paint for fun. Not sure I have time but will consider. I’m amazed at how busy I was this weekend! Maybe this week will settle down -
@Coley yep! I am creating a dimensional illustration. so I'll be building the puppets, the set, and photographing them and editing them digitally.
") Kind of like a still stop motion!
Kind of like a still stop motion! -
@EliaMurrayArt oh that’s so cool

-
This post is deleted!