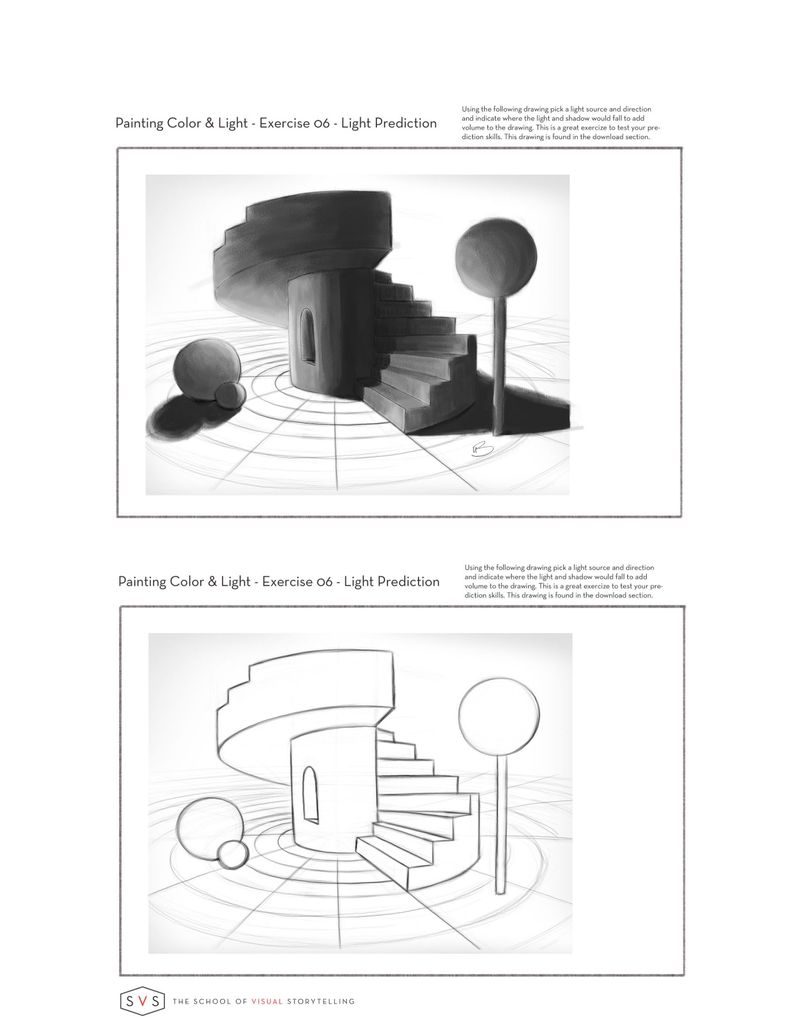
Painting colour and light 2.0 Group run through week Two!
-
This is fun.

Does anyone else have trouble with the lollipop? That stumped me both times.Lisa Burvant
www.lisaburvant.com
Instagram & Twitter & SVS: @burvantill -
@burvantill Yeah I did for sure. One thing I tried that worked well (I ended up doing like 3 of these until I couldn't stand it any more lol) if you do it digitally is copying the shape of the lollipop and then transform > distort and dragged it around until it felt right.
That works pretty well for most of the separate shapes so you start off with the right proportions.
-
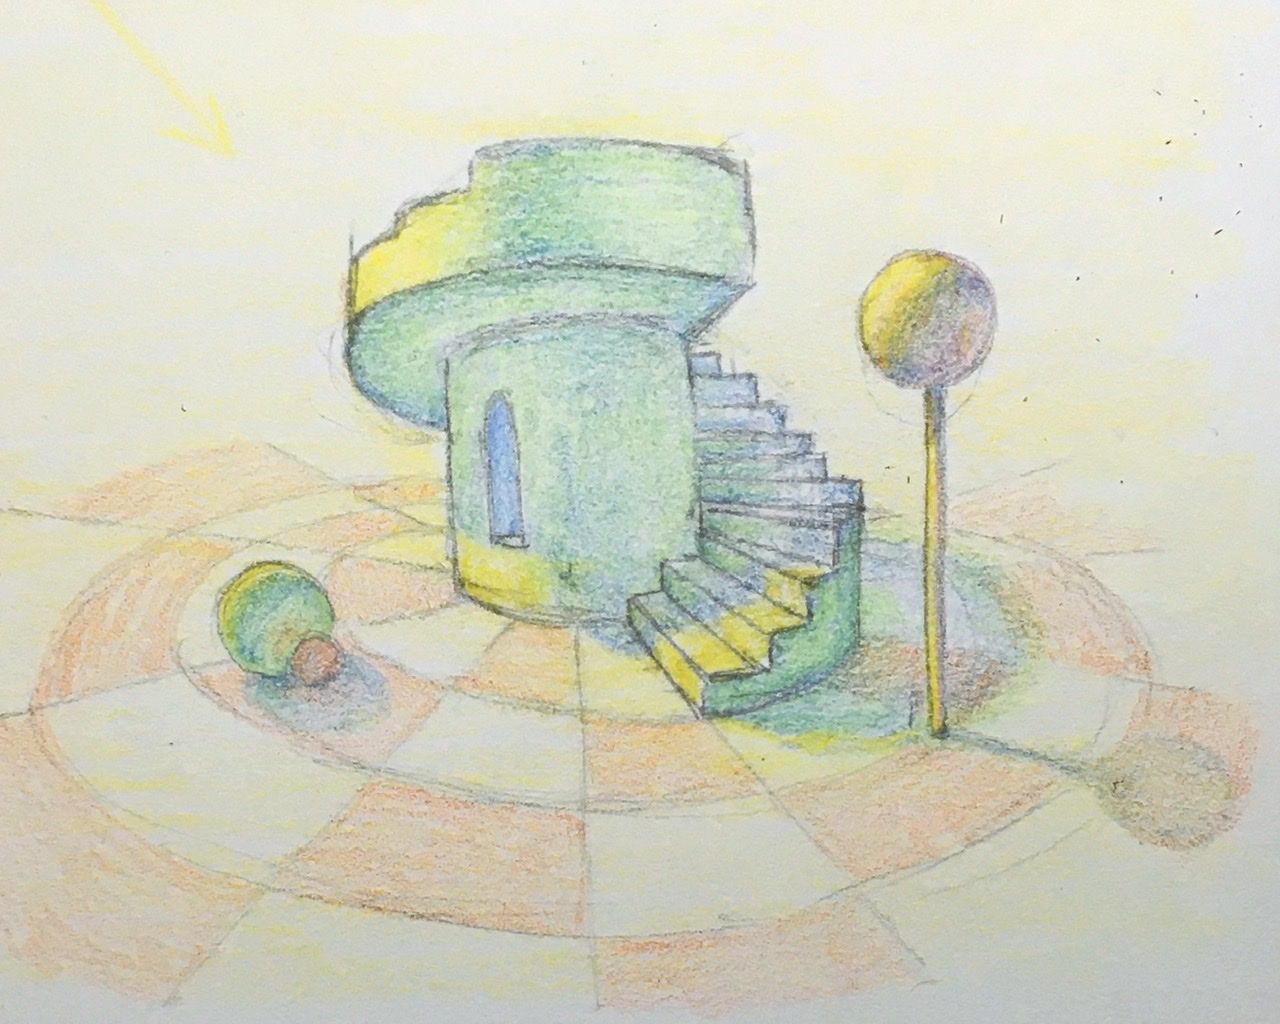
I did my best. I did my best, lols. I know I missed some cast shadows. Oh the struggle but I love light and shadow so I'll keep pushing through it. Thank you @jdubz and @burvantill for the stair case shadow. Left an empty one to return to complete it later/replace it.
-
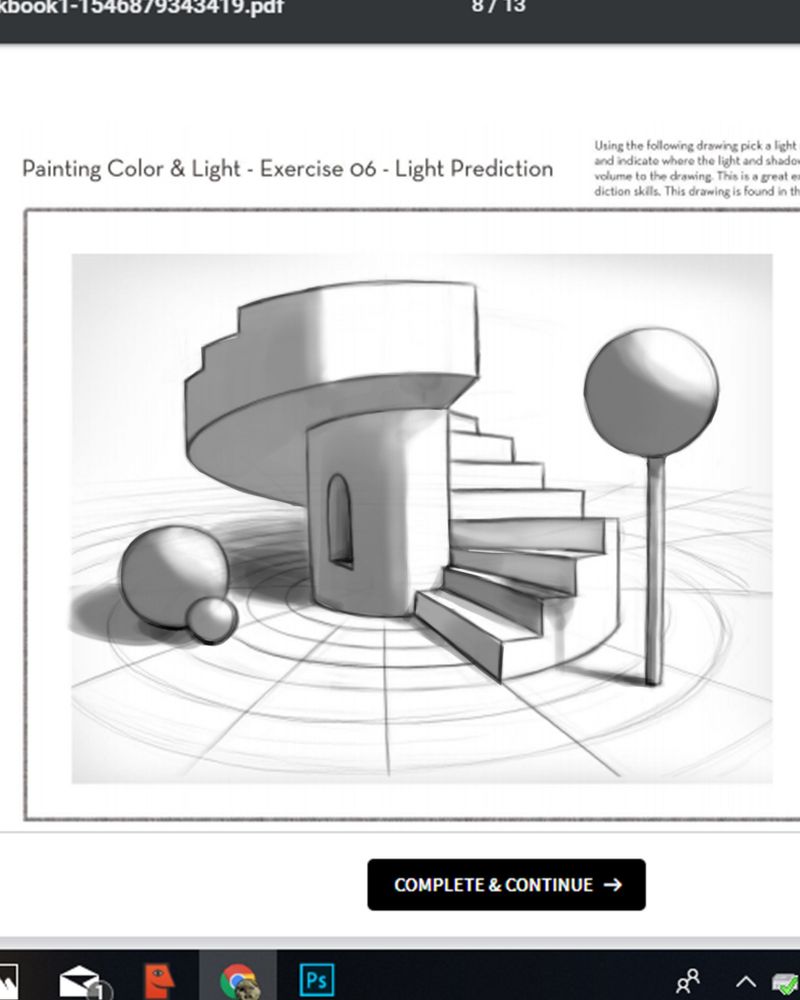
Things always get busy when I decide to do one of these courses, lol. But I did it! For this exercise I was NOT worried about local value, but just where light would hit and where the shadows would be.
If anyone is having a hard time with this (or, just you know, wants to do better) Go watch the new Light and Shadow for illustrators course. GO WATCH IT.
It will change the way you think about local tone vs. shadows and it is EXCEPTIONALLY well laid out as a class. Seriously. Go watch it.
-
@burvantill said in Painting colour and light 2.0 Group run through week Two!:
Does anyone else have trouble with the lollipop? That stumped me both times.
In what way did it stump you?
-
I'm really curious to what processes you all use when you build a piece. That's something I've struggled with to get right.
For example, are you building the mid-tones and setting the base color of all the objects flat, and then applying shadow, then coming back and adding light?
Let's say you have a darker scene - how dark do you start? Or do you not worry about it and just build the local hue/value, like green couch, red bedspread, blue dress, skintone, etc and then apply a global dark layer to make it fit the darker color tone (like a night scene)?
-
@Braden-Hallett start it in 2020 one by one good review but I don’t have the time now.
-
@Braden-Hallett the ball at the top. From where the light is coming from vs where the viewer is makes the light hitting to ball tough to capture. I looked for reference but all I could find were images where the light source and viewpoint are on the same side. I think I got it right but I’m not sure.
I started with a shape like A but then went with B.
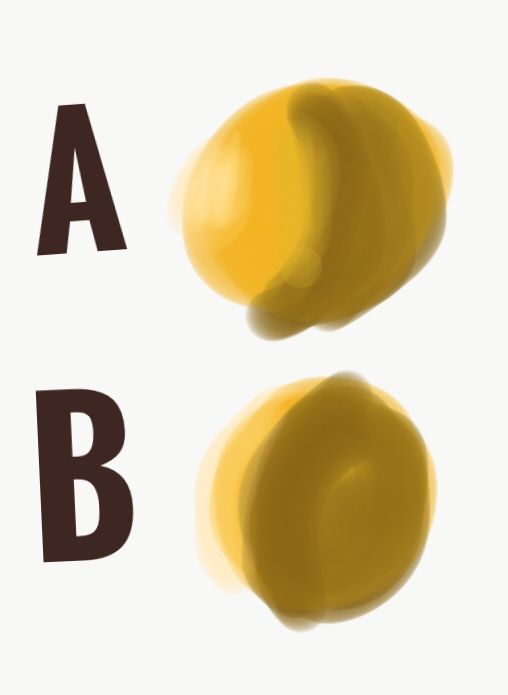
Sorry for the cruddy sample.
Lisa Burvant
www.lisaburvant.com
Instagram & Twitter & SVS: @burvantill -
@jdubz for me it depends on what media I’m using. If I’m doing digital I would normally fill in a local value as if there’s no light source or ambiant light and then put in the lights and shadows. When I’m working in watercolor you have to do it all at the same time it’s a lot to juggle
.
I learned a tip from an episode on Chiustream (either the Core or Plein and Simple) that the real world lives in the mid key values area. There is rarely any pure blacks or pure whites. Unless you are looking at a photo. I try to keep that in my head when I am pushing my darks. -
@jdubz said in Painting colour and light 2.0 Group run through week Two!:
For example, are you building the mid-tones and setting the base color of all the objects flat, and then applying shadow, then coming back and adding light?
Pretty much, yup
")
As for the darker scene, For the most part even if I'm doing a scene that's 'dark', it's really not dark at all. It's just predominately cool. It's dimmer, yeah, but not DARK dark.
Overall the big things that have helped me have been doing a really REALLY simple value study using 5 values only, and doing a colour study (which I'm starting to refer to as a minipainting). My problem was always though I had to figure it out as I went with the full size piece instead of working small and playing until I got something that looked 'right' if you get what I mean.
-
@burvantill said in Painting colour and light 2.0 Group run through week Two!:
he ball at the top. From where the light is coming from vs where the viewer is makes the light hitting to ball tough to capture. I looked for reference but all I could find were images where the light source and viewpoint are on the same side. I think I got it right but I’m not sure.
I always think of phases of the moon. Crescent and gibbous show the moon (a sphere) lit from different angles. In other words, yes you did it right
-
@jdubz said in Painting colour and light 2.0 Group run through week Two!:
I'm really curious to what processes you all use when you build a piece. That's something I've struggled with to get right.
For digital I'm stumbling my way around a bit trying to find something that feels right and works for me. For watercolour things are generally a little more structured just because you have to work with the nature of the paint. Usually highlights are reserved then you work from light to dark and wet to dry. I generally follow something like this tea-milk-honey method:
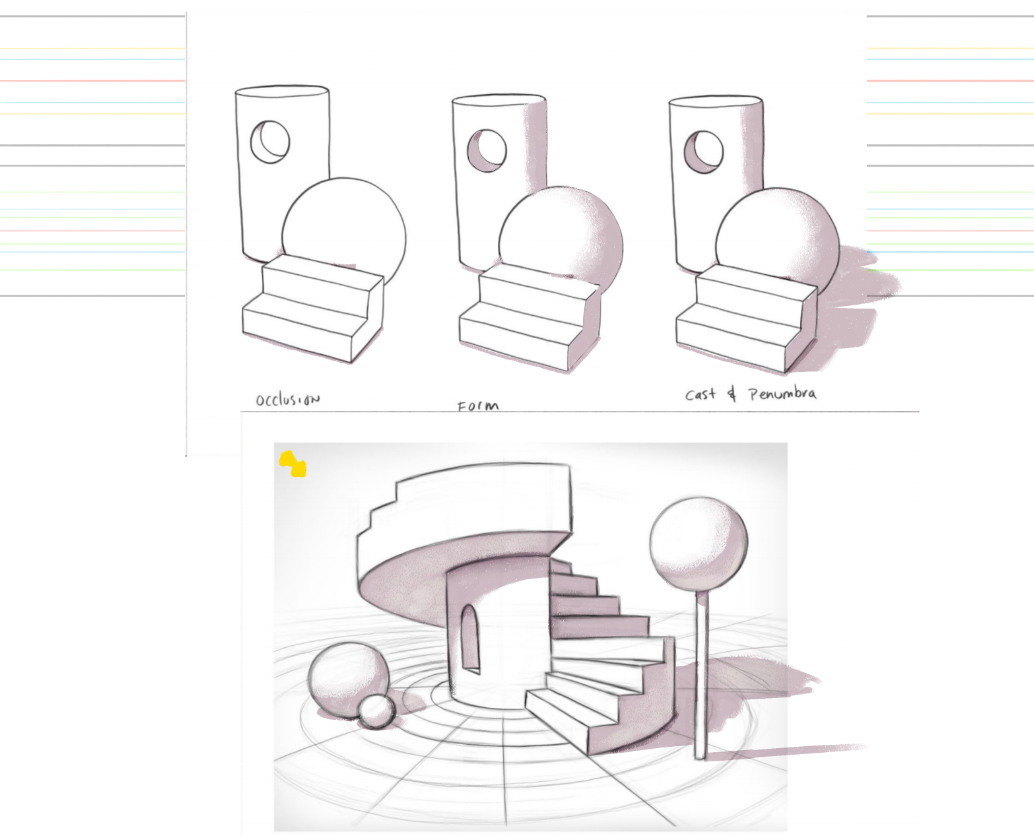
https://www.google.com/amp/s/citizensketcher.com/2014/08/19/printable-cheat-sheet-for-tea-milk-and-honey-workshop/amp/You wash in local colour and general form very loosely then add cast shadows then the darkest darks - doorways, contact shadows (I guess that's occlusion shadows) so kinda the opposite order from the three steps in the painting colour & light instructions. I find the tea-milk-honey way more intuitive but it might just be because I learnt that first.
Nicola Schofield
Twitter: twitter.com/NSchofieldArt
Instagram: instagram.com/NicolaSchofieldArt/ -
my exercise 03. I didn't look at anyone else's stuff before I did mine as I wanted to just use my own brain to think ha ha.
I did a similar angle of light as @Braden-Hallett as it turns out and I also didn't work on any local value or highlights etc, just the shadows only. i noticed Braden had a shadow for the taller cylinder which makes a lot of sense as it is taller than the sphere so it definitely could show up!
i used a really soft brush, next attempt I;m going to try a different brush and different angle.
This is not as easy as it looks! (Just like everything in art ) So grateful I have a like minded group to follow along with and get some learnin done so excited for all the learning and progress to come in 2020!
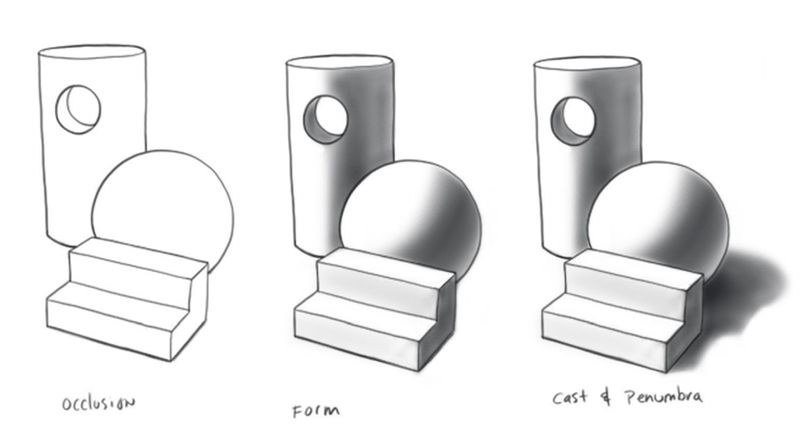
-
@neschof Thanx for sharing the link

-
After I said I’d join you doing this class, things got really busy. I got as far as collecting some reference for week 1 but never had time to post it so I’ve decided I’m just going to lurk for the rest of the time. I love looking at everyone’s homework though; I’ll learn from your work!
-
shadow coming from upper right. All caught up now
-
@Coley I’m loving that reflected light on the ball
Lisa Burvant
www.lisaburvant.com
Instagram & Twitter & SVS: @burvantill -
I will be unable to continue as much as I would like. Time crunch with two works I have planned to finish this month.
All the best!
-
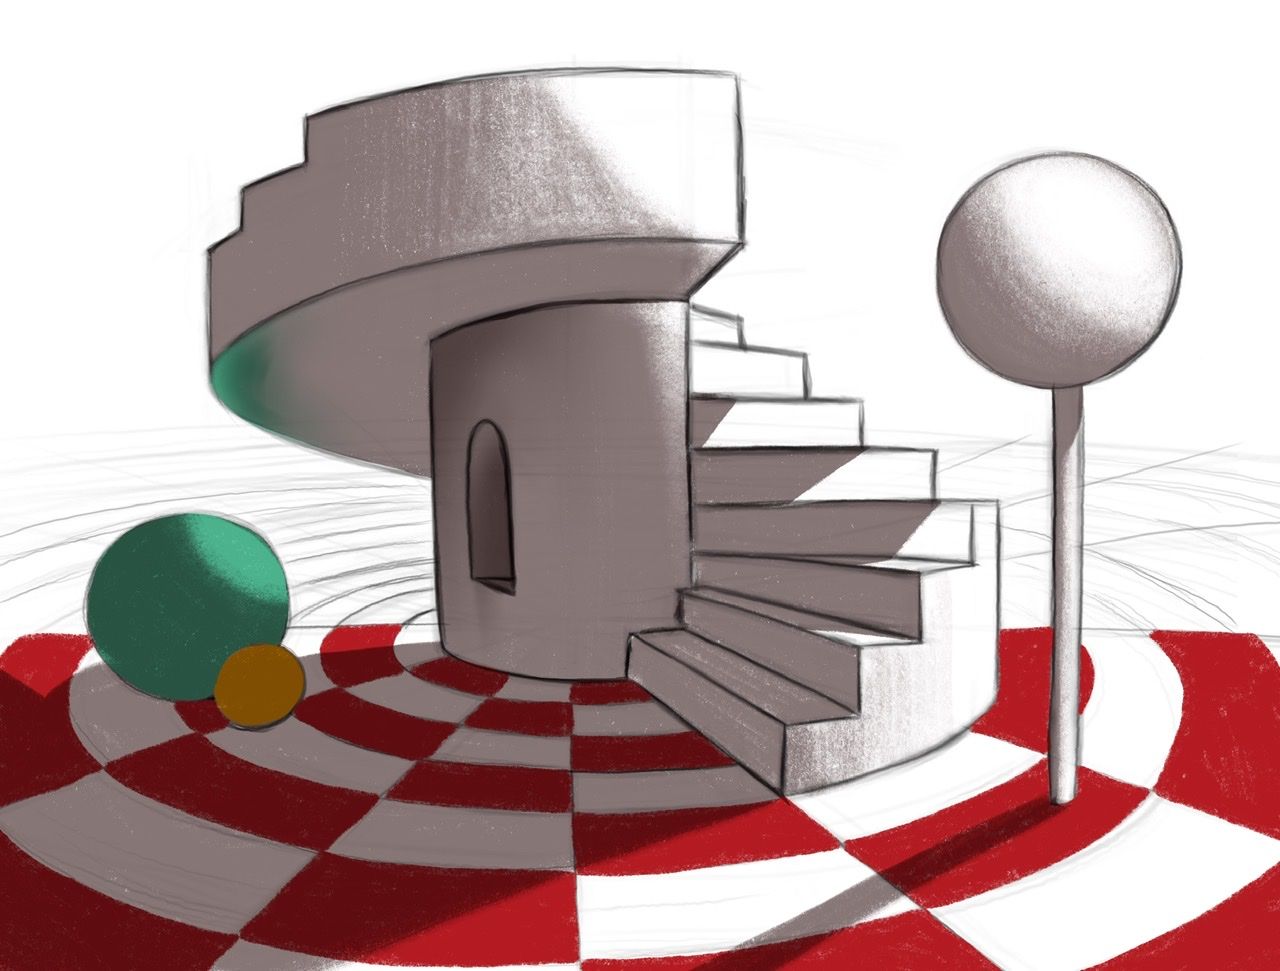
I’m finding this one much harder! I think I only added colour to feel like I was making progress

Nicola Schofield
Twitter: twitter.com/NSchofieldArt
Instagram: instagram.com/NicolaSchofieldArt/ -
@neschof I think you had the same trouble I did with the large ball and the light hitting it side on. Braden gave me a tip and I took this image from the web to help in these difficult situations. LOL
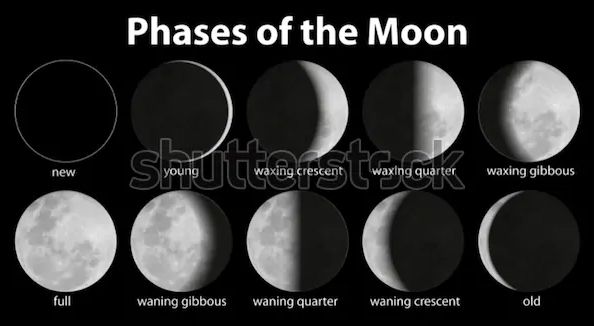
I think your ball would look like "young" moon or "old" moon flipped.Lisa Burvant
www.lisaburvant.com
Instagram & Twitter & SVS: @burvantill